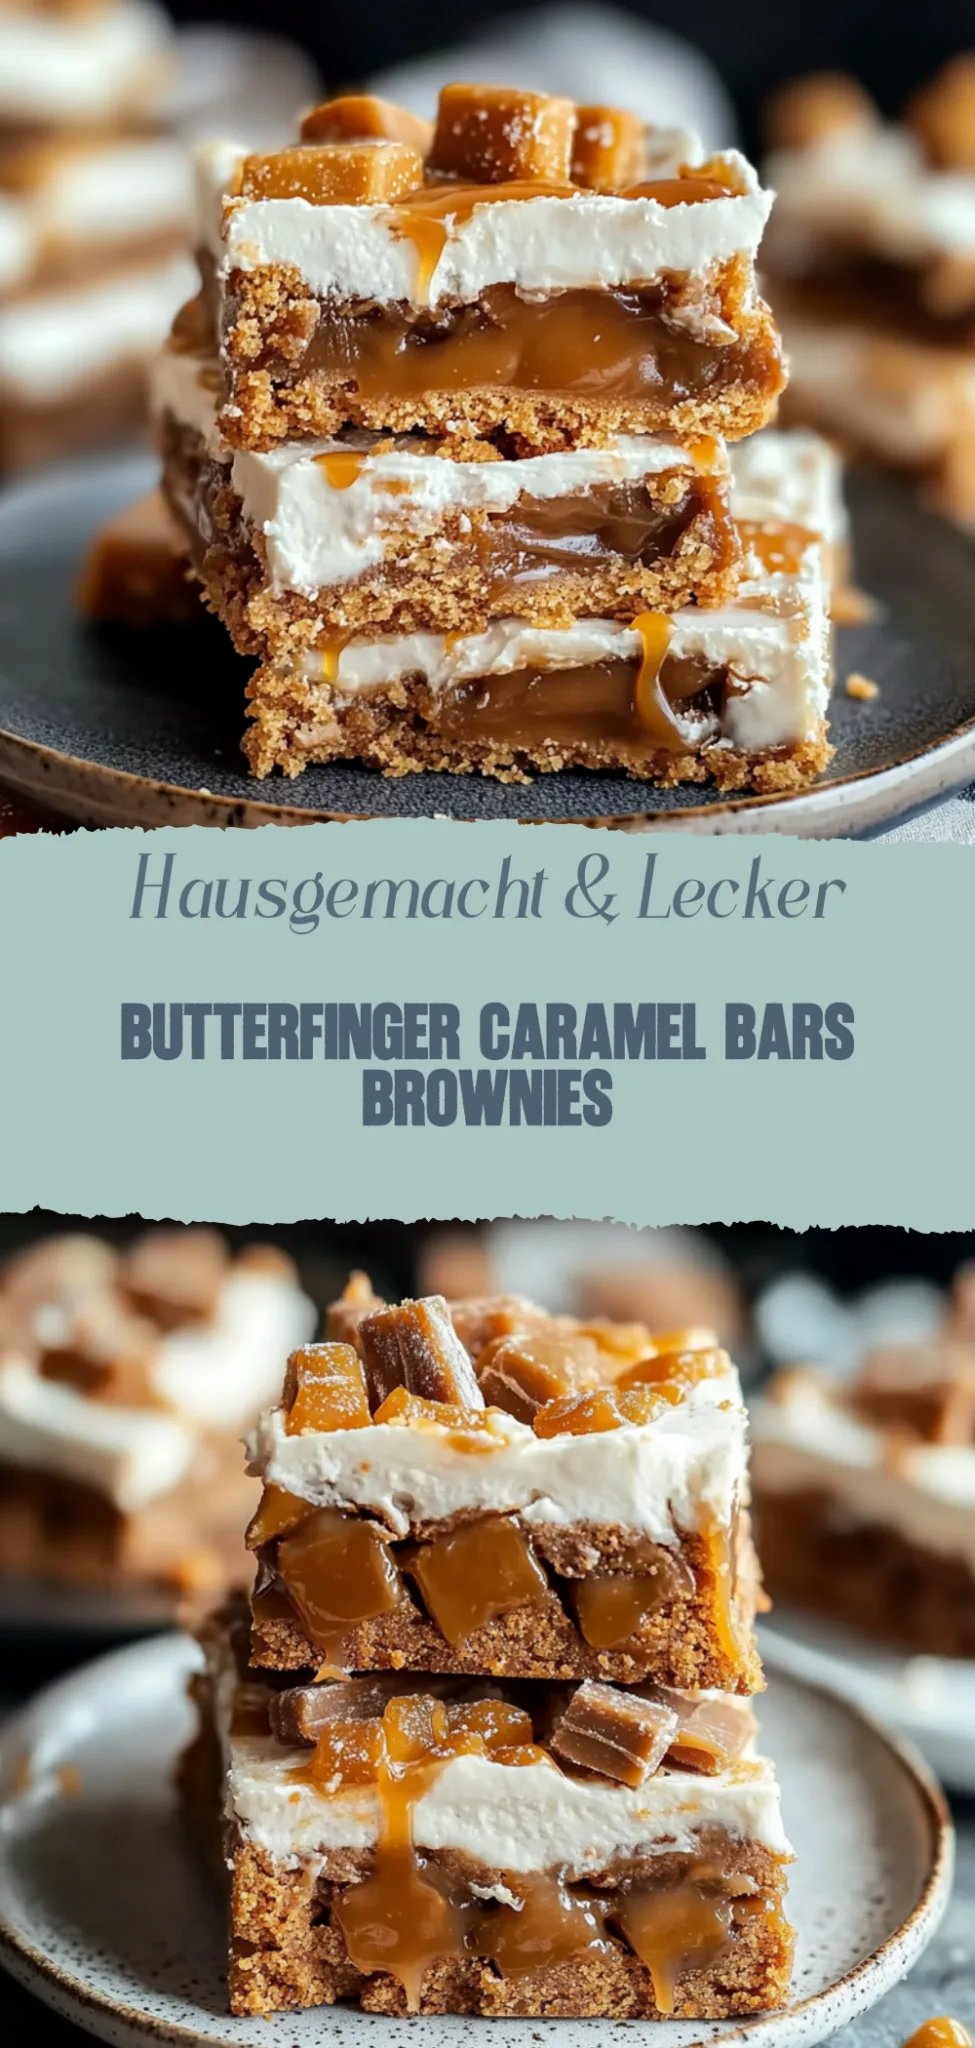
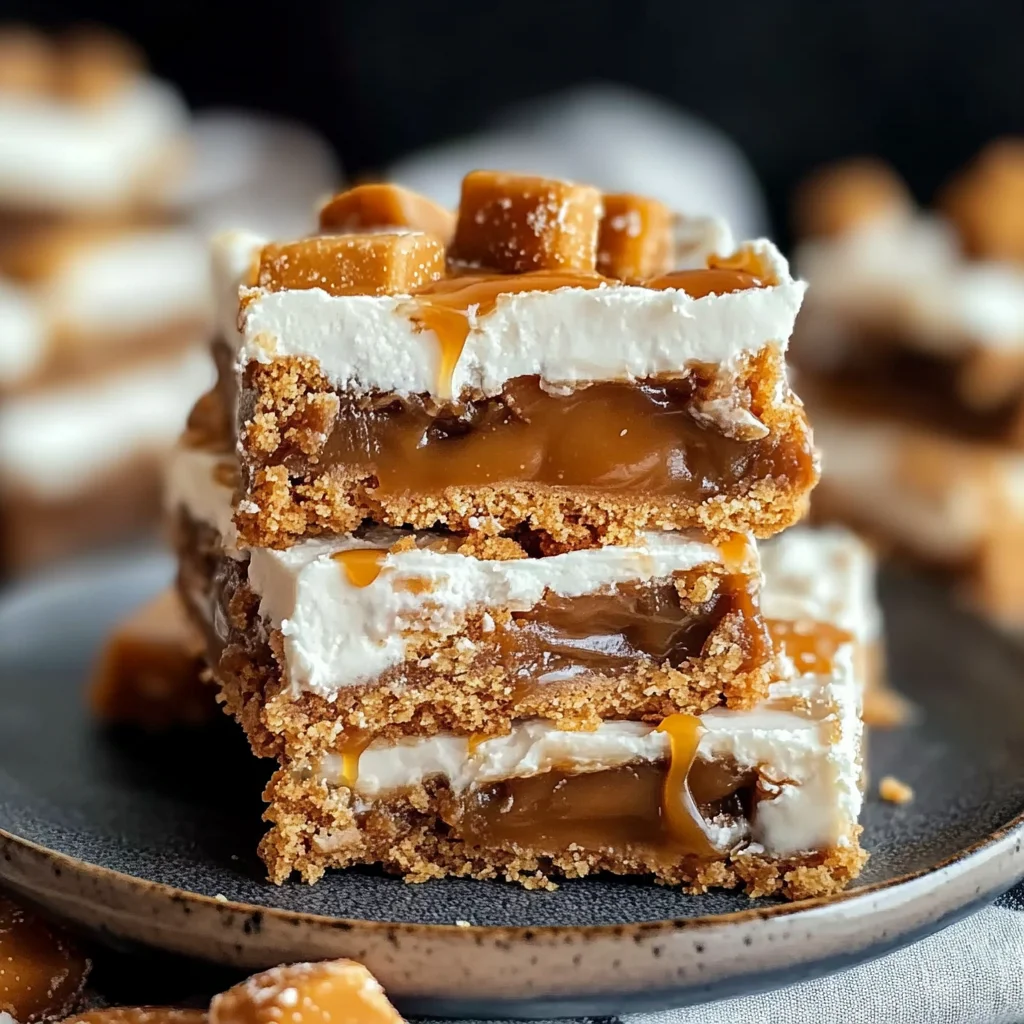
Butterfinger Caramel Bars: Irresistibly Gooey Delight
Imagine sinking your teeth into a warm, gooey slice of chocolate cake, where rich cocoa mingles with velvety frosting that glistens like a treasure trove of sweetness. The aroma wafts through the air, wrapping you in a comforting embrace that instantly transports you back to childhood birthday parties, where each bite felt like pure magic and laughter echoed around the room.
Now picture this delightful indulgence served at gatherings with friends, cozy family dinners, or even that late-night craving you just can’t shake off. This chocolate cake isn’t just dessert; it’s a celebration of life’s sweetest moments, promising an explosion of flavor that dances on your taste buds and leaves you yearning for more. Get ready to dive into a recipe that captures nostalgia and joy in every mouthwatering morsel!
Why are Butterfinger Caramel Bars a must-try?
Indulge in the perfect blend of chocolate, caramel, and crunchy Butterfinger bits!
Easy to make, these bars come together in just a few simple steps, making them perfect for busy bakers.
Crowd-pleaser alert! Everyone will be asking for seconds at gatherings or parties.
Versatile enough to customize with your favorite toppings or mix-ins.
Deliciously unique, they offer a delightful twist on traditional dessert bars that you won’t want to miss!
Butterfinger Caramel Bars Ingredients
For the Base:
- 1 cup unsalted butter (softened) – Provides richness; you can substitute with margarine if needed
- 1 cup brown sugar (packed) – For that deep, caramel-like sweetness; light or dark brown sugar works
- 2 cups all-purpose flour – Gives structure to the bars; whole wheat flour can be used for a healthier option
- 1 teaspoon baking powder – Helps the bars rise slightly; don’t omit for best texture
- 1/4 teaspoon salt – Balances the sweetness; use kosher salt for a coarser texture
For the Caramel Layer:
- 14 oz sweetened condensed milk – Creates a creamy, gooey layer; evaporated milk is not a substitute here
- 1 cup caramel bits – Convenient and melt easily; you can also make your own caramel sauce if desired
- 1/2 teaspoon vanilla extract – Enhances the flavors of the caramel; avoid imitation vanilla for better taste
For the Topping:
- 1 cup Butterfinger candy bars (crumbled) – Adds crunch and that signature peanut butter flavor; crush them in a zip-top bag for easy handling
- 1 cup semi-sweet chocolate chips – Melts beautifully over the top; milk chocolate can be substituted for a sweeter finish
These delicious Butterfinger Caramel Bars are sure to be a family favorite!
How to Make Butterfinger Caramel Bars
1. Preheat your oven to 350°F (175°C). This step ensures that your Butterfinger Caramel Bars bake evenly, giving you that perfect golden-brown crust.
2. Mix the crust ingredients in a large bowl until combined. You want a crumbly mixture that holds together when pressed; this will form the base of your delicious bars.
3. Press the mixture firmly into a greased baking dish. Aim for an even layer across the bottom, about ½ inch thick, to create a sturdy foundation for your sweet toppings.
4. Bake the crust for 10-12 minutes, or until it turns lightly golden. The aroma wafting through your kitchen will be heavenly—this is the beginning of something special!
5. Prepare the caramel by melting it gently in a saucepan over low heat. Stir occasionally until it’s smooth and gooey, ready to envelop those delightful Butterfinger pieces.
6. Pour the melted caramel evenly over the baked crust, ensuring every corner gets that luscious touch. Let it cool slightly while you chop up those irresistible Butterfinger bars.
7. Sprinkle chopped Butterfinger pieces generously on top of the caramel layer. Press down lightly so they adhere beautifully, adding crunch and flavor with every bite.
8. Chill the assembled bars in the fridge for about 30 minutes or until set. This waiting time can feel endless but trust me—it’s worth it for those perfect bites!
Optional: Drizzle with chocolate for an extra indulgent touch.
Exact quantities are listed in the recipe card below.
Tips for the Best Butterfinger Caramel Bars
- Room Temperature Ingredients: Make sure your butter and eggs are at room temperature for a smooth batter that blends easily, ensuring perfect Butterfinger Caramel Bars.
- Chill the Dough: After mixing, refrigerate the dough for about 30 minutes. This helps prevent spreading and keeps your bars thick and chewy.
- Watch Your Bake Time: Every oven is different! Start checking your Butterfinger Caramel Bars a few minutes before the suggested time to avoid overbaking.
- Layering Strategy: For even distribution, crumble the Butterfinger pieces evenly over the caramel layer. This guarantees every bite is filled with deliciousness!
- Cool Completely: Allow the bars to cool completely in the pan before cutting. This helps them set properly and makes slicing easier without crumbling.
How to Store and Freeze Butterfinger Caramel Bars
Room Temperature: Keep your Butterfinger Caramel Bars in an airtight container for up to 3 days. This ensures they stay soft and delicious while maintaining their rich flavor.
Fridge: For longer freshness, store them in the refrigerator in an airtight container. They can last up to a week, but allow them to come to room temperature before enjoying for the best taste.
Freezer: To extend their life even further, freeze your Butterfinger Caramel Bars wrapped tightly in plastic wrap and then placed in a freezer bag. They will stay fresh for up to 3 months.
Reheating: When ready to indulge, simply take them out of the fridge or freezer and let them sit at room temperature for about 15 minutes. Enjoy the gooey goodness!
Butterfinger Caramel Bars Variations Galore
Feel free to make this recipe your own with these delightful twists and substitutions.
- Gluten-Free: Use your favorite gluten-free cookie mix instead of regular cookies for a deliciously safe treat. This ensures everyone can enjoy the sweet goodness without worry.
- Nutty Delight: Add chopped nuts like pecans or almonds for an extra crunch and flavor contrast. They’ll provide a lovely texture that perfectly complements the creamy caramel.
- Vegan Option: Swap butter with coconut oil and use dairy-free chocolate for a plant-based version that doesn’t skimp on taste. Your friends will be amazed at how rich and satisfying these bars can be!
- Spicy Kick: Sprinkle a pinch of cayenne pepper into the caramel for an unexpected heat that balances the sweetness beautifully. It’s a bold move that will surprise and delight adventurous eaters.
- Chocolate Lovers: Double the chocolate layer by adding chocolate chips to the base mixture. This creates a gooey, indulgent experience that chocolate fans won’t be able to resist.
- Coconut Twist: Incorporate shredded coconut in the crust or topping for a tropical flair. The chewy coconut pairs wonderfully with the buttery caramel, transporting you straight to paradise.
- Fruit Fusion: Mix in dried fruits like cranberries or cherries for a burst of tartness amidst the sweetness. This adds a delightful chewiness and color contrast, making each bite even more exciting.
- Minty Fresh: Infuse some mint extract into the chocolate layer for a refreshing twist. It’s like enjoying a dessert version of your favorite minty candies!
Make Ahead Options
If you’re looking to save time in the kitchen while still enjoying the delightful taste of Butterfinger Caramel Bars, this recipe is perfect for meal prep. You can prepare the base and caramel layer up to 24 hours in advance; simply store them in an airtight container in the refrigerator. To do this, bake the base, allow it to cool completely, and then pour the caramel over it before refrigerating. When you’re ready to finish your Butterfinger Caramel Bars, take them out, sprinkle with chopped Butterfinger candy, and pop them back into the oven for about 10 minutes until warmed through. This method not only saves time but also ensures that every bite is fresh and delicious!
Butterfinger Caramel Bars Recipe FAQs
What type of butter should I use for Butterfinger Caramel Bars?
For the best flavor and texture, I recommend using unsalted butter. This allows you to control the saltiness of your bars. Make sure it’s at room temperature for easy mixing—about 30 minutes out of the fridge should do the trick!
How should I store my Butterfinger Caramel Bars?
Once cooled, store your Butterfinger Caramel Bars in an airtight container at room temperature for up to 5 days. If you want to keep them fresh longer, you can refrigerate them for up to 2 weeks. Just let them come to room temperature before enjoying; they’re best served slightly warm!
Can I freeze Butterfinger Caramel Bars?
Absolutely! These bars freeze like a dream. Once completely cooled, wrap them tightly in plastic wrap, then place them in a freezer-safe bag or container. They can be frozen for up to 3 months. When you’re ready to enjoy a treat, just thaw them in the fridge overnight or at room temperature for a couple of hours.
What should I do if my caramel is too runny?
If your caramel turns out too runny, don’t worry! You can simmer it gently on low heat for a few extra minutes until it thickens to your desired consistency. Stir constantly to avoid burning and achieve that perfect gooey texture you crave in your Butterfinger Caramel Bars.
Are there any dietary alternatives for this recipe?
Certainly! For a gluten-free version, simply use gluten-free graham crackers instead of regular ones. If you’re looking for a dairy-free option, try using vegan butter and coconut milk-based caramel. There are plenty of sweet alternatives out there to ensure everyone can enjoy these delicious bars!
Can I add other toppings or mix-ins?
Absolutely! Feel free to get creative by adding chopped nuts or drizzling melted chocolate over the top before serving. Mini marshmallows also make a delightful addition if you’re looking for an extra layer of sweetness and texture in your Butterfinger Caramel Bars!
Butterfinger Caramel Bars
Ingredients
Method
- Preheat the oven to 350°F (175°C). Grease and line a 9x9 inch baking pan with parchment paper.
- In a mixing bowl, combine melted butter and brown sugar until smooth.
- Add flour and oats, mix until combined. Stir in chocolate chips.
- Press the mixture evenly into the bottom of the prepared baking pan.
- Bake for 15 minutes, then remove from oven and let cool slightly.
- In a saucepan over low heat, combine unwrapped caramel candies and heavy cream.
- Stir until the caramel is melted and smooth.
- Pour the caramel mixture over the baked base, spreading evenly.
- Sprinkle crushed Butterfinger bars over the caramel layer.
- Melt additional chocolate chips and drizzle over the top.
- Refrigerate for at least 2 hours until set.
- Cut into bars and serve.