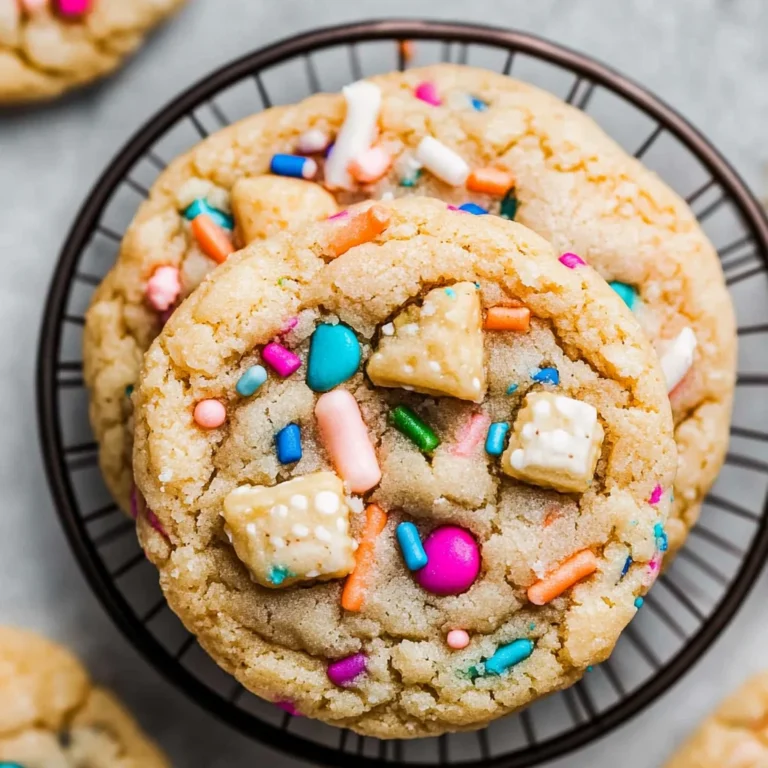
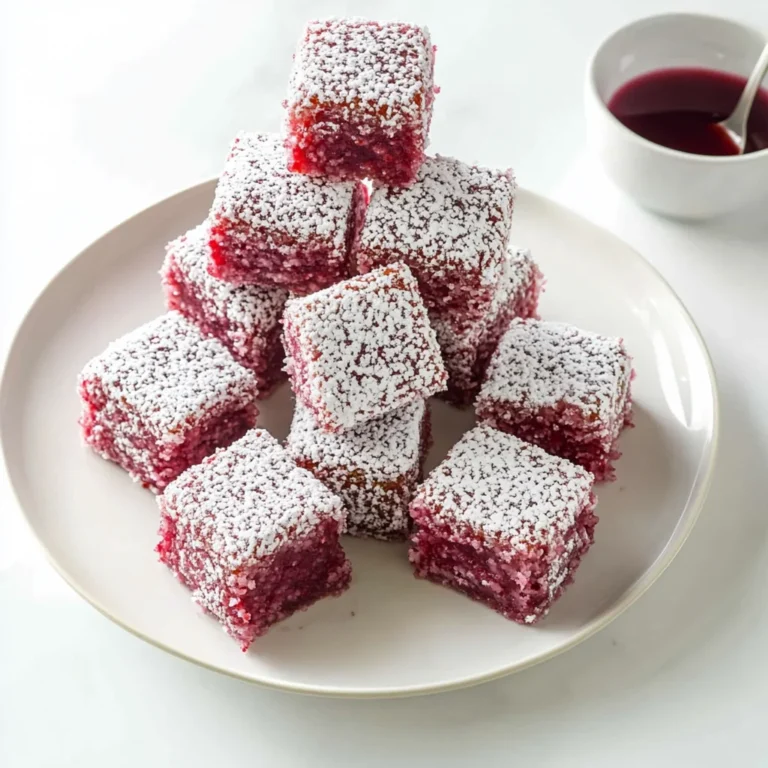
Spring Blossom Cookies: Delightfully Sweet and Chewy
Imagine sinking your teeth into a warm, gooey slice of chocolate cake, the rich aroma wafting through the air like a sweet embrace. Each bite reveals layers of velvety chocolate intermingled with a hint of espresso, creating an unforgettable flavor explosion that dances on your palate.
I still remember the first time I baked this decadent delight for my best friend’s birthday, the kitchen filled with laughter and frosting-covered faces. Whether it’s for a cozy family gathering or a festive celebration, this chocolate cake promises to steal the show and leave everyone craving just one more slice.
Why will Spring Blossom Cookies surprise you?
Delightful flavors combine sweet vanilla and zesty lemon for a refreshing treat.
Easy to make in just 30 minutes, perfect for busy bakers!
Visually stunning, these cookies bring a touch of spring to any gathering.
Versatile options allow you to customize with your favorite sprinkles or nuts.
Crowd-pleaser status guarantees smiles at parties, picnics, or family gatherings!
Spring Blossom Cookies Ingredients
For the Cookie Dough:
- 2 cups all-purpose flour – This forms the base of your cookies; for gluten-free, use a 1:1 baking blend.
- 1 teaspoon baking powder – Helps your cookies rise beautifully; don’t skip this for fluffy results.
- 1/2 teaspoon salt – Enhances the sweetness of your cookies; kosher salt is recommended for best flavor.
- 1 cup unsalted butter (softened) – Adds richness and moisture; use coconut oil for a dairy-free option.
- 3/4 cup granulated sugar – Sweetens the dough; brown sugar can be used for a deeper flavor.
- 3/4 cup powdered sugar – Gives a lovely sweetness and smooth texture to the dough; sifted is best.
- 2 large eggs – Binds the ingredients together; room temperature eggs work best for even mixing.
- 1 tablespoon vanilla extract – Adds warmth and depth; consider almond extract for a nutty twist.
For the Decorations:
- 1/2 cup edible flower petals (like violets or pansies) – These make your cookies visually stunning and add a lovely floral note.
- 1/4 cup colored sprinkles – For extra fun and cheerfulness; feel free to match colors with your occasion.
Enjoy creating these delightful Spring Blossom Cookies, perfect for celebrating the season!
How to Make Spring Blossom Cookies
1. Preheat your oven to 350°F (175°C). This ensures your cookies bake evenly and achieve that delightful golden brown color we all love.
2. Cream together the butter and sugar in a mixing bowl until light and fluffy. This step is crucial for achieving that airy texture in your Spring Blossom Cookies.
3. Add the eggs, one at a time, blending well after each addition. This will help incorporate air, resulting in a tender cookie.
4. Mix in the vanilla extract and any desired food coloring to give your cookies a cheerful spring hue. Aim for pastel shades that reflect the season!
5. Combine the dry ingredients: flour, baking powder, and salt in another bowl. Whisk them together to ensure an even distribution of leavening agents.
6. Gradually add the dry mixture to the wet ingredients, stirring just until combined. Be careful not to overmix; we want soft, delicate cookies!
7. Scoop tablespoon-sized portions of dough onto a lined baking sheet, spacing them about two inches apart. They will spread slightly during baking.
8. Bake for 10-12 minutes or until the edges are lightly golden. The centers should look slightly underbaked; they’ll firm up as they cool.
9. Cool on the baking sheet for a few minutes before transferring them to wire racks. This helps maintain their softness while allowing them to set perfectly.
Optional: Sprinkle with powdered sugar for an extra touch of sweetness before serving.
Exact quantities are listed in the recipe card below.
Tips for the Best Spring Blossom Cookies

- Chill the Dough: Allow your cookie dough to chill for at least 30 minutes to prevent spreading and ensure a thicker, chewier texture.
- Perfect Measuring: Use a kitchen scale for precise measurements. This helps avoid dry or overly wet dough that can ruin your Spring Blossom Cookies.
- Butter Temperature: Make sure your butter is at room temperature before creaming. Cold butter won’t incorporate air properly, affecting fluffiness.
- Add Flavor: Experiment with extracts like almond or orange zest for a delightful twist that enhances the spring flavors in your cookies.
- Watch the Bake Time: Keep a close eye on your cookies in the oven. They should be lightly golden around the edges but still soft in the center for perfect results.
How to Store and Freeze Spring Blossom Cookies
- Room Temperature: Store your Spring Blossom Cookies in an airtight container for up to 3 days to keep them fresh and chewy.
- Fridge: If you prefer a longer shelf life, these delightful cookies can be refrigerated for up to a week. Just ensure they’re well-wrapped to prevent drying out.
- Freezer: For extended enjoyment, freeze your Spring Blossom Cookies in a single layer on a baking sheet before transferring them to a freezer-safe bag. They’ll stay delicious for up to 3 months!
- Reheating: To savor the warm, comforting flavors, reheat cookies in the oven at 350°F for about 5 minutes. Enjoy that fresh-baked taste all over again!
Spring Blossom Cookies Customization Ideas
Elevate your baking experience by tailoring these delightful treats to suit your tastes and dietary needs!
- Gluten-Free: Substitute all-purpose flour with a 1:1 gluten-free blend for a lighter, equally delicious cookie. Enjoy the same amazing flavors while accommodating gluten sensitivities.
- Nut-Free: Replace any nut ingredients with sunflower seeds or pumpkin seeds for a safe, crunchy alternative. These seeds add a delightful texture without compromising on taste.
- Chocolate Chip Twist: Add semi-sweet or white chocolate chips for an extra layer of indulgence. The melty goodness will elevate these cookies to a whole new level of yum!
- Citrus Zest Boost: Incorporate lemon or orange zest into the dough for a refreshing citrusy note. This brightens up the flavor profile and adds a lovely fragrance to your baking.
- Oatmeal Addition: Mix in rolled oats for added heartiness and chewiness. This variation creates a satisfying texture that makes every bite feel like a warm hug.
- Spicy Kick: Sprinkle in some cinnamon or cayenne pepper for an unexpected warmth. Just a pinch can transform the flavor and add an exciting element to each cookie.
- Vegan Option: Swap eggs with flaxseed meal mixed with water and use plant-based butter. You’ll create cookies that are just as soft and scrumptious while keeping them vegan-friendly.
- Dried Fruit Delight: Toss in dried cranberries, cherries, or apricots for a chewy sweetness that complements the cookie’s base beautifully. Each bite becomes a delightful surprise!
Make Ahead Options
Spring Blossom Cookies are not only delightful but also perfect for meal prep, allowing you to enjoy their sweet flavors without the last-minute rush. To make your baking experience smoother, you can prepare the dough up to 24 hours in advance. Simply mix all your ingredients as instructed, wrap the dough tightly in plastic wrap, and refrigerate it. When you’re ready to bake, just take it out and let it sit at room temperature for about 10 minutes before rolling into balls and baking. For even longer storage, you can freeze the unbaked cookies for up to three months; just make sure to place them on a parchment-lined baking sheet, freeze until solid, then transfer them to a zip-top bag. This way, your Spring Blossom Cookies will taste as fresh as ever when baked straight from the freezer—just add an extra minute or two to the baking time!
Spring Blossom Cookies Recipe FAQs
What kind of butter is best for Spring Blossom Cookies?
I recommend using unsalted butter for these cookies. This allows you to control the saltiness in your recipe. Make sure it’s at room temperature so it creams beautifully with the sugar, resulting in a light and fluffy texture.
How should I store my Spring Blossom Cookies?
Store your cookies in an airtight container at room temperature for up to one week. If you want to keep them fresher for longer, place a slice of bread in the container; it helps maintain moisture and keeps your cookies soft!
Can I freeze Spring Blossom Cookies?
Absolutely! You can freeze these delightful cookies for up to three months. Just make sure they are completely cooled before placing them in a single layer on a baking sheet. Once frozen solid, transfer them to a freezer-safe bag or container. When you’re ready to enjoy, thaw them at room temperature for about 30 minutes.
What if my cookie dough is too sticky?
If your dough feels too sticky, don’t fret! This can happen due to humidity or not enough flour being added. Simply sprinkle in a bit more flour, one tablespoon at a time, until you reach that perfect consistency—smooth but slightly tacky. Remember, every kitchen has its quirks!
Are there any dietary alternatives I can use for Spring Blossom Cookies?
Yes! For a gluten-free version, substitute all-purpose flour with a 1: 1 gluten-free baking blend. If you’re looking for dairy-free options, try using coconut oil or vegan butter instead of regular butter. Just be aware that these substitutions may alter the flavor slightly, but they still yield delicious results!
What type of decorations work best on Spring Blossom Cookies?
You can get creative with decorations! Edible flowers like violets or pansies not only enhance the visual appeal but also add a delightful touch of flavor. Alternatively, colorful sprinkles or icing can make your cookies pop—perfect for spring celebrations and gatherings!

Spring Blossom Cookies
Ingredients
Method
- Preheat the oven to 350°F (175°C). In a mixing bowl, combine the flour, baking powder, and salt. Set aside.
- In another bowl, cream the softened butter and granulated sugar together using an electric mixer until light and fluffy.
- Add the egg and vanilla extract to the butter mixture and mix until well combined.
- Gradually add the dry ingredients to the wet mixture, mixing until just combined.
- Scoop tablespoon-sized portions of dough and roll them into balls. Place them on a baking sheet lined with parchment paper.
- Flatten each ball slightly and press edible flowers into the top of each cookie.
- Bake in the preheated oven for 10-12 minutes or until the edges are lightly golden.
- Remove from the oven and let cool on the baking sheet for a few minutes before transferring to a wire rack to cool completely.
- Dust the cooled cookies with powdered sugar before serving.