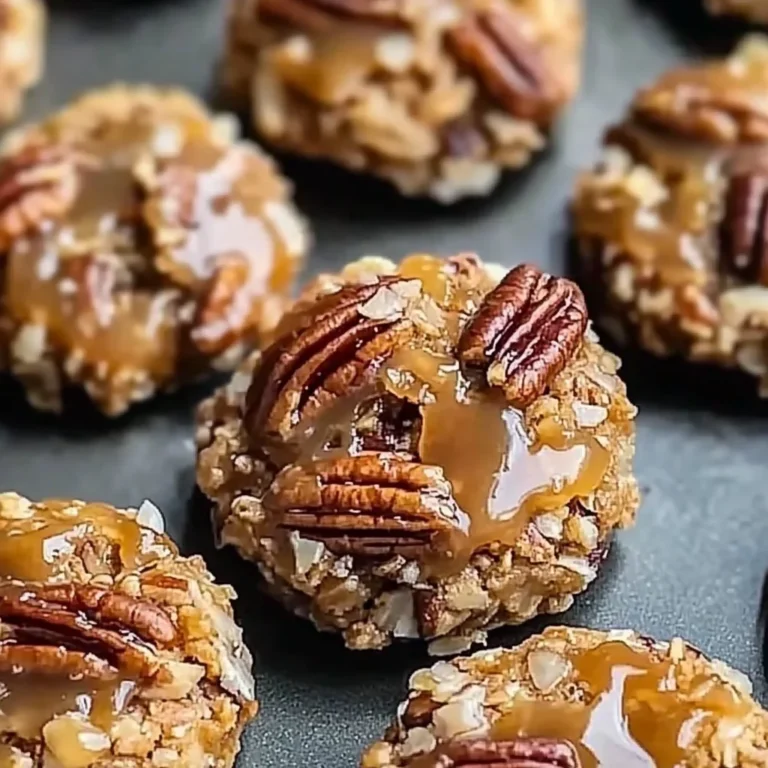
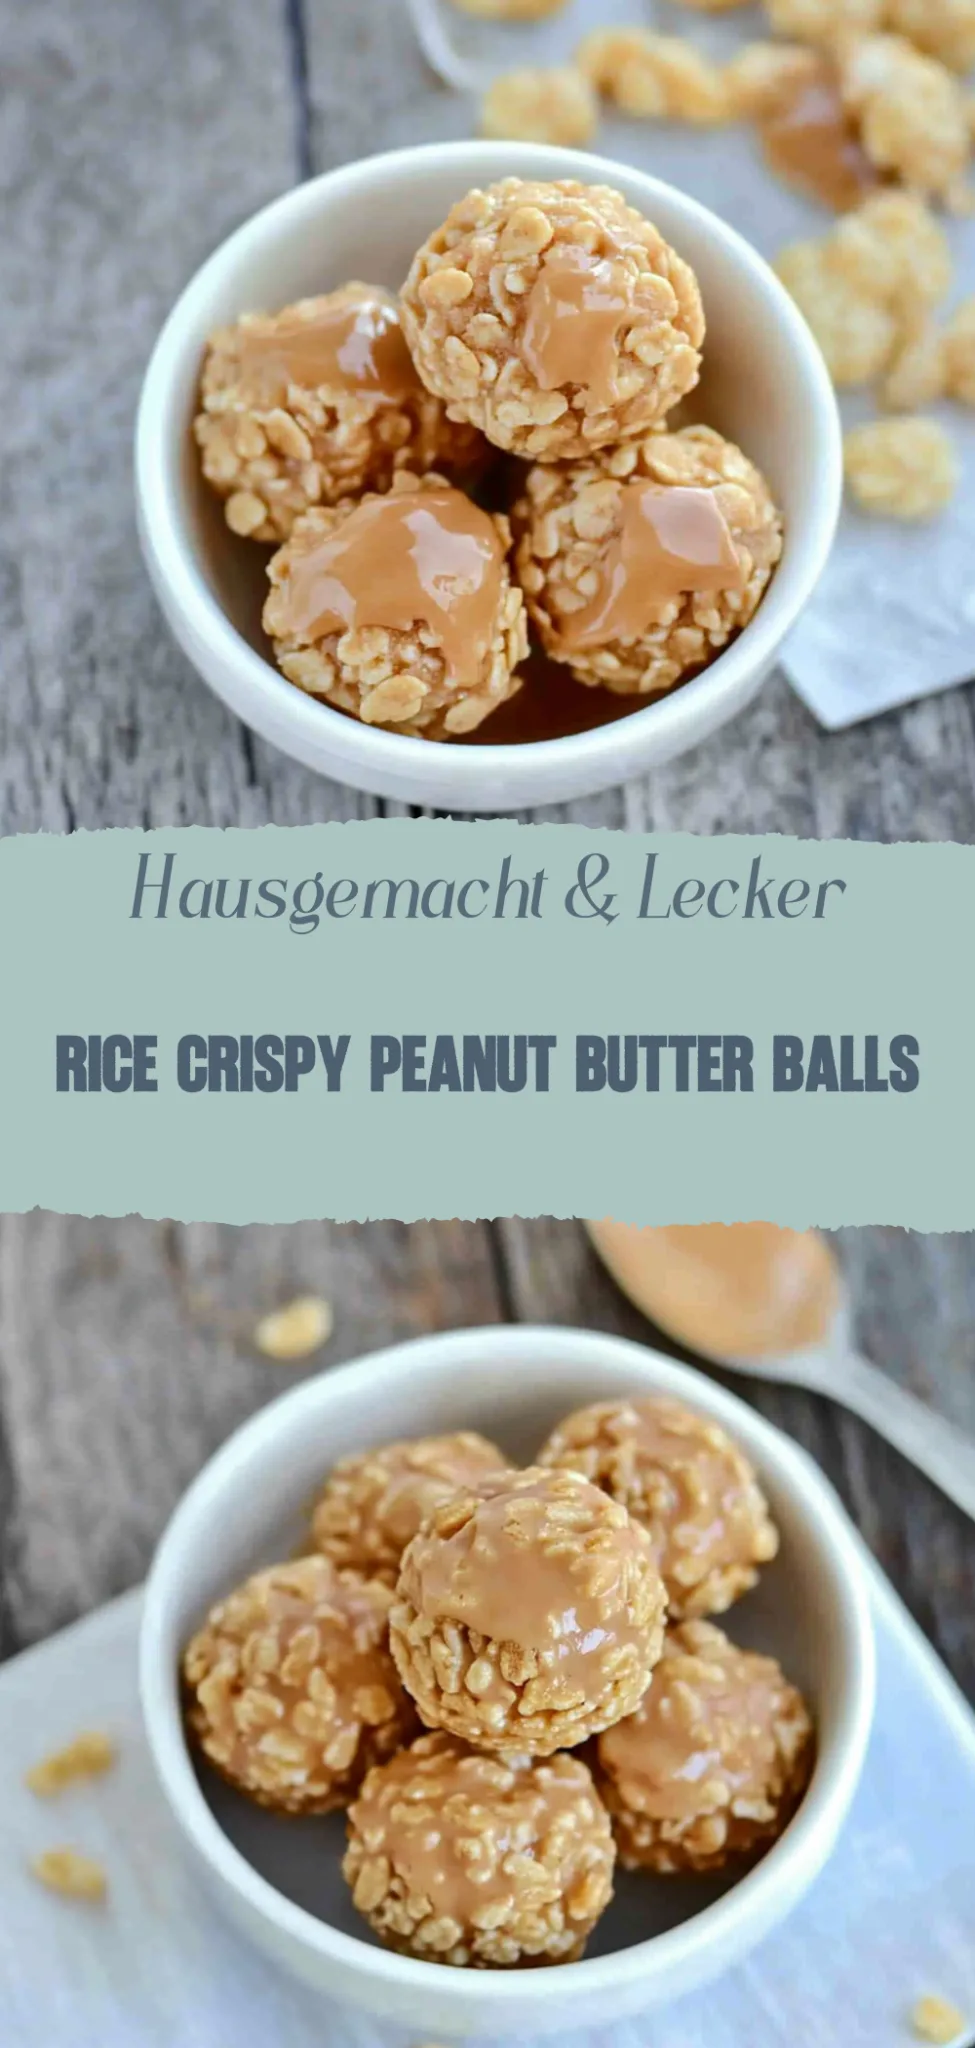
Rice Crispy Peanut Butter Balls: A Gooey Delight!
Imagine biting into a warm, gooey slice of chocolate cake that melts in your mouth, with rich cocoa notes dancing on your taste buds and the sweet aroma wafting through the air. This dessert isn’t just a treat; it’s an experience that transforms any mundane day into a celebration, whether it’s a birthday bash or a cozy evening at home.
As I recall my grandmother’s kitchen filled with laughter and the scent of freshly baked goodies, I can’t help but smile. It was there that I learned the secret to this indulgent chocolate cake, perfect for sharing during special occasions or simply enjoying on a rainy afternoon. Trust me, once you take that first bite, you’ll be hooked on its decadent flavors and inviting textures!
Why are Rice Crispy Peanut Butter Balls a must-try?
Deliciously easy to make, these treats require just a few ingredients and minimal prep time!
Irresistibly crunchy, the combination of rice crispy cereal and creamy peanut butter creates a delightful texture.
Versatile for any occasion, they’re perfect as snacks, dessert, or party favors!
Kid-approved, even picky eaters can’t resist their sweet charm.
Time-saving delight, whip up a batch in under 30 minutes and enjoy the smiles they’ll bring!
Rice Crispy Peanut Butter Balls Ingredients
For the Base:
- 2 cups rice cereal – This gives the balls their signature crunch; feel free to use a gluten-free option if needed.
- 1 cup creamy peanut butter – The star of the show, providing rich flavor; substitute with almond butter for a different twist.
- 1/2 cup honey – Acts as a natural sweetener and binder; maple syrup can be used for a vegan option.
For the Coating:
- 1/2 cup semi-sweet chocolate chips – Melts perfectly for coating; dark chocolate can be used for a richer flavor.
- 1 tablespoon coconut oil – Helps the chocolate melt smoothly; you can also use vegetable oil in a pinch.
For Topping (Optional):
- 1/4 cup chopped peanuts – Adds extra crunch and flavor; omit if you prefer a smoother texture.
- Pinch of sea salt – Enhances the sweetness and balances flavors beautifully.
These delightful Rice Crispy Peanut Butter Balls are perfect for snack time or a sweet treat!
How to Make Rice Crispy Peanut Butter Balls
1. Gather ingredients: Start by collecting all your ingredients—crisp rice cereal, creamy peanut butter, honey, and a pinch of salt. This makes the process smooth and enjoyable!
2. Mix together: In a large mixing bowl, combine 1 cup of peanut butter with ½ cup of honey. Stir until well blended and creamy for that perfect texture.
3. Add cereal: Gently fold in 3 cups of crisp rice cereal into the peanut butter mixture. Ensure every piece is coated evenly for delightful crunch in every bite.
4. Form balls: With clean hands, scoop out tablespoon-sized portions of the mix and roll them into balls. Aim for about 1-inch in diameter for a perfect bite-sized treat!
5. Chill: Place your formed Rice Crispy Peanut Butter Balls on a parchment-lined baking sheet and refrigerate for at least 30 minutes. This helps them firm up nicely.
6. Serve & enjoy: Once chilled, serve these tasty bites to family or friends! They’re perfect for snacks or dessert; everyone will love their sweet, nutty flavor.
Optional: Drizzle with melted chocolate for an extra indulgent touch!
Exact quantities are listed in the recipe card below.
Tips for the Best Rice Crispy Peanut Butter Balls
- Use Fresh Ingredients: Ensure your rice cereal and peanut butter are fresh for the best flavor and texture in your Rice Crispy Peanut Butter Balls.
- Measure Carefully: Accurate measuring of peanut butter and marshmallows prevents the mixture from being too sticky or too dry.
- Cool Before Rolling: Allow the mixture to cool slightly before rolling into balls. This makes handling easier and keeps them from sticking to your hands.
- Chill for Firmness: Refrigerate the balls after shaping them. Chilling helps them hold their shape better and enhances their taste.
- Don’t Overmix: Mix just until combined to keep your Rice Crispy Peanut Butter Balls light and airy—overmixing can lead to a dense texture.
Storage Tips for Rice Crispy Peanut Butter Balls
- Room Temperature: Keep your Rice Crispy Peanut Butter Balls in an airtight container for up to 3 days. They make a delightful snack right when you need a pick-me-up!
- Fridge: For longer freshness, store them in the refrigerator in a sealed container. They can last up to 1 week while maintaining their delicious texture.
- Freezer: Freeze your Rice Crispy Peanut Butter Balls by wrapping them individually in plastic wrap, then placing them in a freezer-safe bag. They’ll stay fresh for up to 3 months!
- Reheating: If you prefer a warm treat, simply microwave them for about 10-15 seconds. Enjoy the gooey goodness that melts your heart!
Rice Crispy Peanut Butter Balls Variations
Customize these delightful treats to match your cravings and dietary needs for a truly personal touch!
- Vegan: Substitute honey with maple syrup or agave nectar for a plant-based sweetness. You’ll be amazed at how the flavors sing together!
- Nut-Free: Use sunbutter or soy nut butter instead of peanut butter to keep it safe for kids with nut allergies. The result is still creamy and delicious!
- Chocolate Drizzle: Melt dark or milk chocolate and drizzle over the balls for an extra layer of indulgence. This addition takes your bites from simple to sensational.
- Coconut Flakes: Roll the balls in unsweetened shredded coconut for a tropical twist. The chewy texture pairs wonderfully with the crunchiness of rice crisps.
- Spicy Kick: Add a pinch of cayenne pepper or chili powder to the peanut butter mixture for a surprising heat. It’s an unexpected flavor adventure that will awaken your taste buds!
- Protein Boost: Mix in protein powder to amp up the nutrition without compromising taste. This way, you can enjoy a guilt-free snack that fuels your day.
- Fruit Infusion: Incorporate mini chocolate chips or dried fruits like cranberries for a burst of sweetness. The additional textures create a delightful surprise in every bite.
- Oatmeal Crunch: Blend in quick oats for added fiber and a heartier texture. These little gems will keep you satisfied longer while adding a wholesome element!
Make Ahead Options
If you’re looking for a convenient way to enjoy your Rice Crispy Peanut Butter Balls without the last-minute rush, this recipe is perfect for meal prep! You can easily prepare the mixture up to 24 hours in advance by combining the peanut butter, marshmallows, and cereal; simply store it in an airtight container in the fridge. For optimal flavor and texture, shape the balls just before serving or within 3 days of making the mixture. When you’re ready to finish them off, remove the mixture from the fridge, roll it into bite-sized balls, and let them sit at room temperature for about 10-15 minutes. This way, you’ll maintain their delightful chewiness and ensure a fresh taste every time!
Rice Crispy Peanut Butter Balls Recipe FAQs
What type of peanut butter is best for this recipe?
Creamy peanut butter works best for a smooth texture, but if you love a little crunch, feel free to use chunky peanut butter! Natural peanut butter can also be used, but be aware that it may alter the consistency slightly, making the mixture less sticky.
How should I store my Rice Crispy Peanut Butter Balls?
Store your Rice Crispy Peanut Butter Balls in an airtight container at room temperature for up to one week. If you live in a warmer climate, it’s best to keep them in the fridge to avoid any melting and maintain their delightful shape!
Can I freeze Rice Crispy Peanut Butter Balls?
Absolutely! To freeze, place your Rice Crispy Peanut Butter Balls in a single layer on a baking sheet until firm, then transfer them to a freezer-safe bag or container. They can last up to three months in the freezer. Just let them thaw at room temperature for about 15-20 minutes before enjoying!
What should I do if my mixture is too dry?
If your mixture feels crumbly and won’t hold together, add a tablespoon of honey or additional peanut butter gradually until you reach the right consistency. It should be sticky enough to form into balls without falling apart—don’t hesitate to get your hands in there to mix it well!
Are there any dietary considerations with this recipe?
Yes! These treats are gluten-free as long as you use certified gluten-free rice cereal. You can also substitute honey with maple syrup for a vegan-friendly option. Always check labels on ingredients if you’re catering to specific dietary needs or allergies.
Can I add other ingredients like chocolate chips or nuts?
Definitely! Feel free to mix in mini chocolate chips, dried fruits, or chopped nuts for added flavor and texture. Just ensure that any additions don’t overly disrupt the balance of wet and dry ingredients so that your balls hold together nicely. Enjoy experimenting!