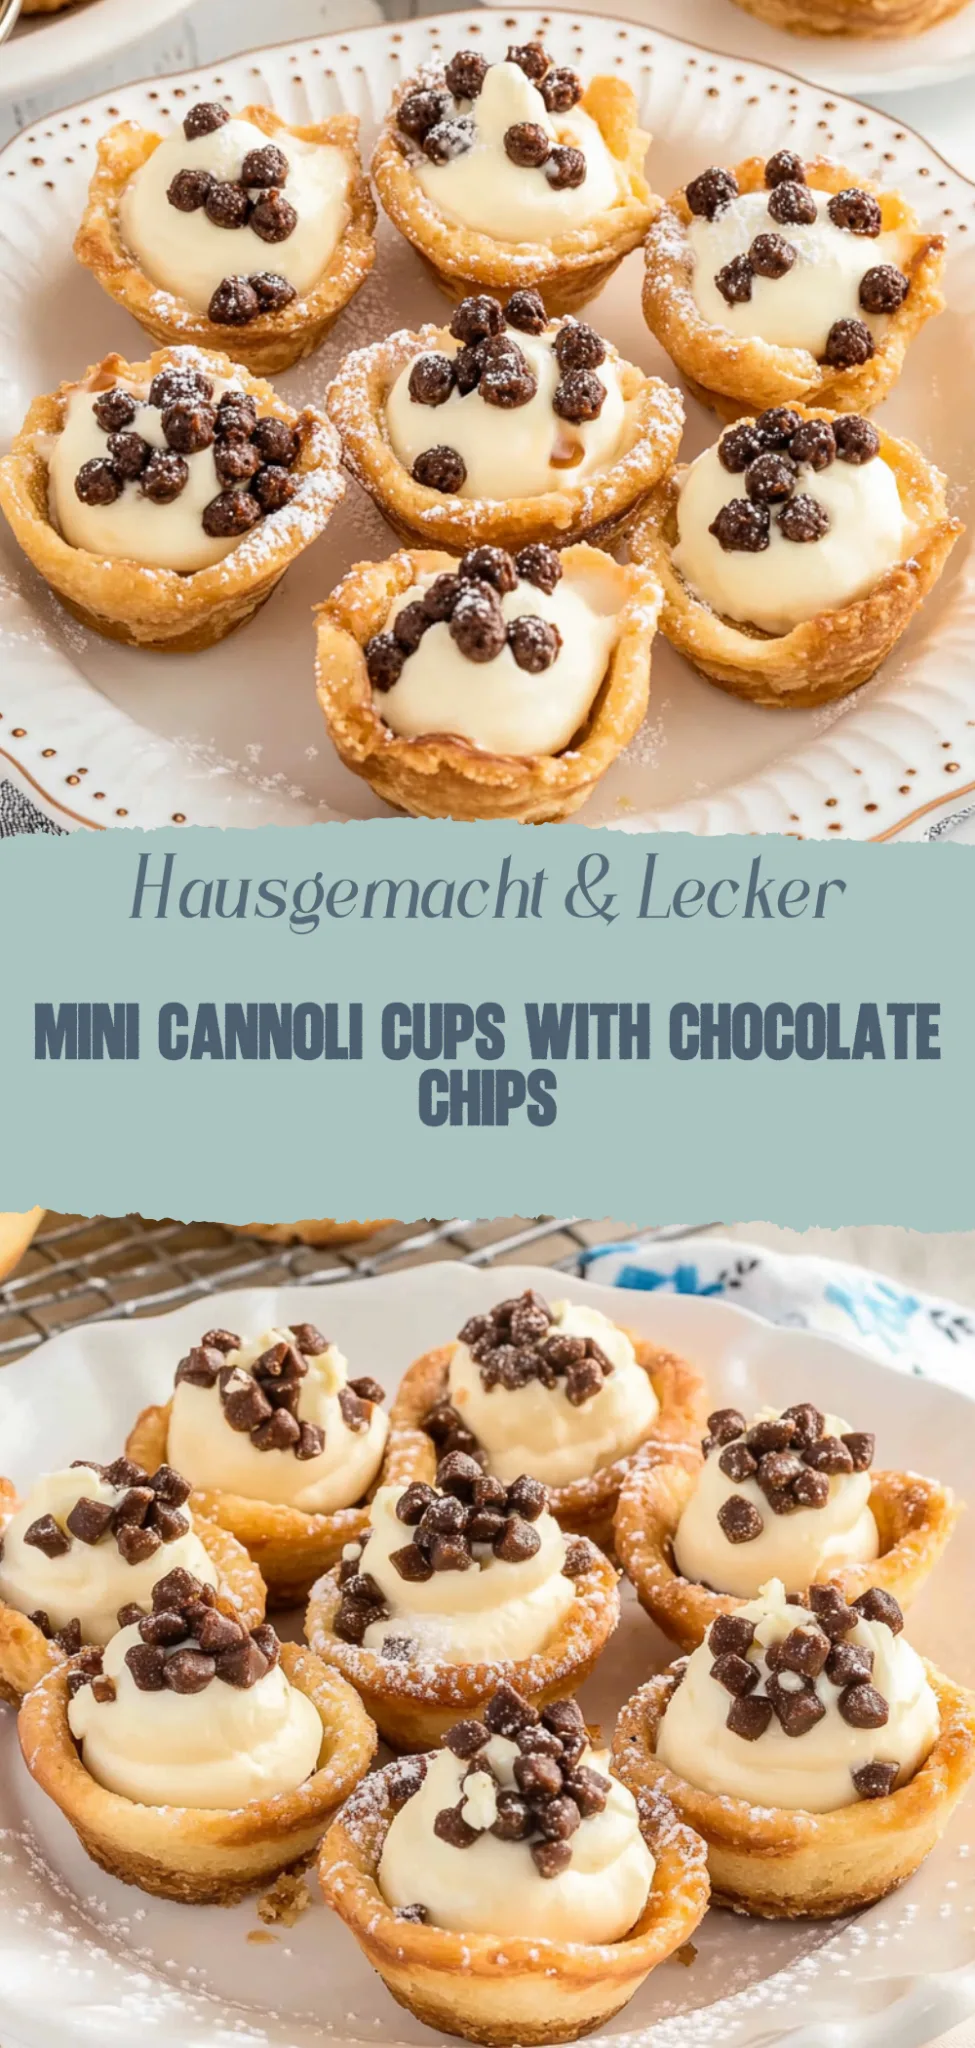
Mini Cannoli Cups: Indulgent Sweet Treats You’ll Love
Imagine sinking your teeth into a warm, flaky pastry that bursts with the sweet tang of ripe cherries and a hint of cinnamon, evoking memories of sunlit summer picnics and laughter shared with loved ones. The aroma wafts through the air, inviting you to indulge in a slice of nostalgia that promises to transport you back to carefree days filled with joy and deliciousness.
Now picture this delightful treat gracing your table during family gatherings or cozy weekend brunches, where every bite is met with smiles and satisfied sighs. As the flavors dance on your palate, you’ll find yourself reminiscing about cherished moments while creating new ones, making this experience unforgettable and truly special.
Why are Mini Cannoli Cups a must-try?
Irresistible flavor: Each bite bursts with creamy ricotta and delightful chocolate chips!
Easy to make: With just a few simple steps, you’ll impress your guests without the fuss.
Versatile: Customize with your favorite toppings like fruit or nuts for a personal twist!
Time-saving: Quick to prepare, these treats are perfect for last-minute gatherings.
Crowd-pleaser: Their adorable size makes them a hit at parties and celebrations!
Mini Cannoli Cups Ingredients
For the Shells:
- 1 package (15 oz) mini phyllo cups – These ready-made shells save time and add a delightful crispiness to your dessert
- 1/4 cup granulated sugar – Sweetens the shells; you can use coconut sugar for a different flavor
- 1 teaspoon cinnamon – Adds warm spice; feel free to omit if you’re not a cinnamon fan
For the Filling:
- 1 1/2 cups ricotta cheese – Use whole-milk ricotta for creaminess; drain excess liquid for a thicker filling
- 1 cup powdered sugar – Sweetens the filling perfectly; adjust to taste for your desired sweetness
- 1 teaspoon vanilla extract – Enhances the flavor; almond extract is a delicious substitute
- 1/2 cup mini chocolate chips – Adds rich chocolate bursts; you could use chopped nuts for a different texture
For Garnish:
- 1/4 cup additional mini chocolate chips – Sprinkle on top for added visual appeal and flavor
- 2 tablespoons pistachios (chopped) – These provide crunch and color; swap with walnuts or almonds if preferred
- Fresh mint leaves (for decoration) – A touch of green makes your Mini Cannoli Cups look even more inviting
These delightful Mini Cannoli Cups are perfect for any occasion, offering an elegant twist on a classic dessert!
How to Make Mini Cannoli Cups
1. Prepare the pastry: Preheat your oven to 375°F. Roll out the dough and cut into circles, ensuring they fit snugly into your mini muffin tin for that perfect cup shape.
2. Bake until golden: Place the dough circles in the muffin tin and bake for about 12-15 minutes, or until they’re a lovely golden brown. Let them cool completely before filling.
3. Whip the filling: In a mixing bowl, combine ricotta cheese, powdered sugar, and vanilla extract. Beat until smooth and creamy, making sure it’s sweet enough to satisfy your cravings!
4. Fill the cups: Gently spoon the ricotta mixture into each cooled pastry cup, filling them generously but not overflowing. This is where the magic happens!
5. Top with chocolate: Sprinkle mini chocolate chips or chopped pistachios on top of the filled cups for that delightful crunch and flavor contrast.
Optional: Drizzle with melted chocolate for an extra special touch!
Exact quantities are listed in the recipe card below.
Tips for the Best Mini Cannoli Cups
- Use Fresh Ingredients: Opt for high-quality ricotta and mascarpone cheese to ensure a rich, creamy filling that’s bursting with flavor.
- Avoid Soggy Shells: Fill your mini cannoli cups just before serving to maintain their crispness. This prevents them from getting soggy over time.
- Dust with Powdered Sugar: A light sprinkle of powdered sugar on top adds an elegant touch and balances the sweetness, enhancing your mini cannoli cups’ presentation.
- Experiment with Flavors: Don’t hesitate to add vanilla, chocolate chips, or citrus zest to the filling—this personalizes the taste and elevates your mini cannoli cups deliciously.
- Watch Your Baking Time: If you’re making homemade shells, keep an eye on them in the oven; over-baking can lead to hard shells that lose that perfect crunch.
Storage Tips for Mini Cannoli Cups
- Room Temperature: Enjoy your mini cannoli cups fresh for up to 1 day. If left out, cover them with a clean kitchen towel to maintain their crispness.
- Fridge: Store any leftovers in an airtight container in the refrigerator for up to 3 days. This will keep the filling fresh while preventing the shells from becoming soggy.
- Freezer: For longer storage, freeze unfilled mini cannoli cups in a sealed bag for up to 2 months. Thaw at room temperature before filling to enjoy their delightful crunch again.
- Reheating: If you’ve filled your mini cannoli cups and want them slightly warm, pop them in a preheated oven at 300°F (150°C) for about 5 minutes, ensuring not to overheat and lose that lovely texture.
Mini Cannoli Cups You’ll Love
Feel free to personalize these delightful treats with your favorite flavors and textures for a truly memorable experience!
- Dairy-Free: Substitute the ricotta cheese with almond or coconut cream for a creamy, non-dairy filling. Enjoy the same luscious texture without the dairy.
- Chocolate Chip: Fold mini chocolate chips into the filling to add a sweet surprise in every bite. The chocolate brings a rich depth, perfect for chocoholics!
- Fruit-Infused: Mix in pureed strawberries or raspberries for a refreshing fruity twist. This brightens up the traditional flavor and adds a pop of color.
- Spiced Up: Add a pinch of cinnamon or nutmeg to the filling for a warm, spicy note. This subtle enhancement can elevate your cannoli cups and awaken your taste buds.
- Nutty Crunch: Top with crushed pistachios or hazelnuts for an added crunch and depth of flavor. The nuts introduce a delightful contrast to the creamy filling.
- Zesty Lemon: Incorporate lemon zest into the ricotta mixture for a bright, citrusy kick. It offers an unexpected freshness that will leave everyone wanting more.
- Caramel Drizzle: Drizzle salted caramel sauce over the finished cups for an indulgent treat. The sweet and savory blend balances perfectly with the creamy center.
- Spicy Kick: Mix in a dash of cayenne pepper or chili powder to infuse heat into your filling. This unexpected twist can create an exciting flavor adventure!
Make Ahead Options
Preparing Mini Cannoli Cups is a delightful way to save time while still impressing your family and friends. You can make the cannoli filling up to 3 days in advance; simply store it in an airtight container in the refrigerator. The mini shells can be baked a day ahead and kept crisp by sealing them tightly in a zip-top bag. When you’re ready to serve, just fill the shells with the chilled filling, add your favorite toppings like mini chocolate chips or crushed pistachios, and they’ll be ready to enjoy! This strategy not only saves you valuable time but also ensures that your Mini Cannoli Cups maintain their delightful texture and flavor.
Mini Cannoli Cups Recipe FAQs
What ingredients should I use for the filling?
For the filling, I recommend using whole-milk ricotta cheese for a rich and creamy texture. Make sure to drain it well to avoid excess moisture, which can make your filling too runny. You can also mix in mascarpone for added creaminess or swap in some Greek yogurt for a lighter option.
How do I store leftover Mini Cannoli Cups?
Leftover Mini Cannoli Cups can be stored in an airtight container in the refrigerator for up to 2 days. However, I recommend keeping the filling separate from the shells if possible, as the shells can become soggy over time. Just fill them right before serving for that perfect crunch!
Can I freeze Mini Cannoli Cups?
Yes! You can freeze the empty cannoli cups for up to 3 months. Just place them in a single layer on a baking sheet until frozen solid, then transfer them to an airtight container or freezer bag. For the filling, you can freeze it too; just portion it out and thaw it in the fridge overnight before using.
What if my cannoli shells are too soft?
If your cannoli shells turn out too soft, they may not have been baked long enough or at high enough heat. Ensure your oven is preheated to 375°F (190°C), and consider leaving them in a few extra minutes until they’re golden brown and crisp. If you’re using store-bought shells, try popping them in the oven for a few minutes just before serving to restore their crunch!
Are there any dietary alternatives for this recipe?
Absolutely! For a gluten-free option, you can use gluten-free pastry dough or even mini phyllo cups. If you’re making these dairy-free, try using coconut cream mixed with vegan cream cheese as a delightful alternative for the filling. Just make sure all your ingredients align with your dietary needs.
How long does it take to prepare Mini Cannoli Cups?
The preparation time typically takes about 30 minutes if you’re making everything from scratch, including mixing and baking the shells. Allow another hour for chilling the filling before assembling. But trust me—the effort is worth every bite of these dreamy desserts!