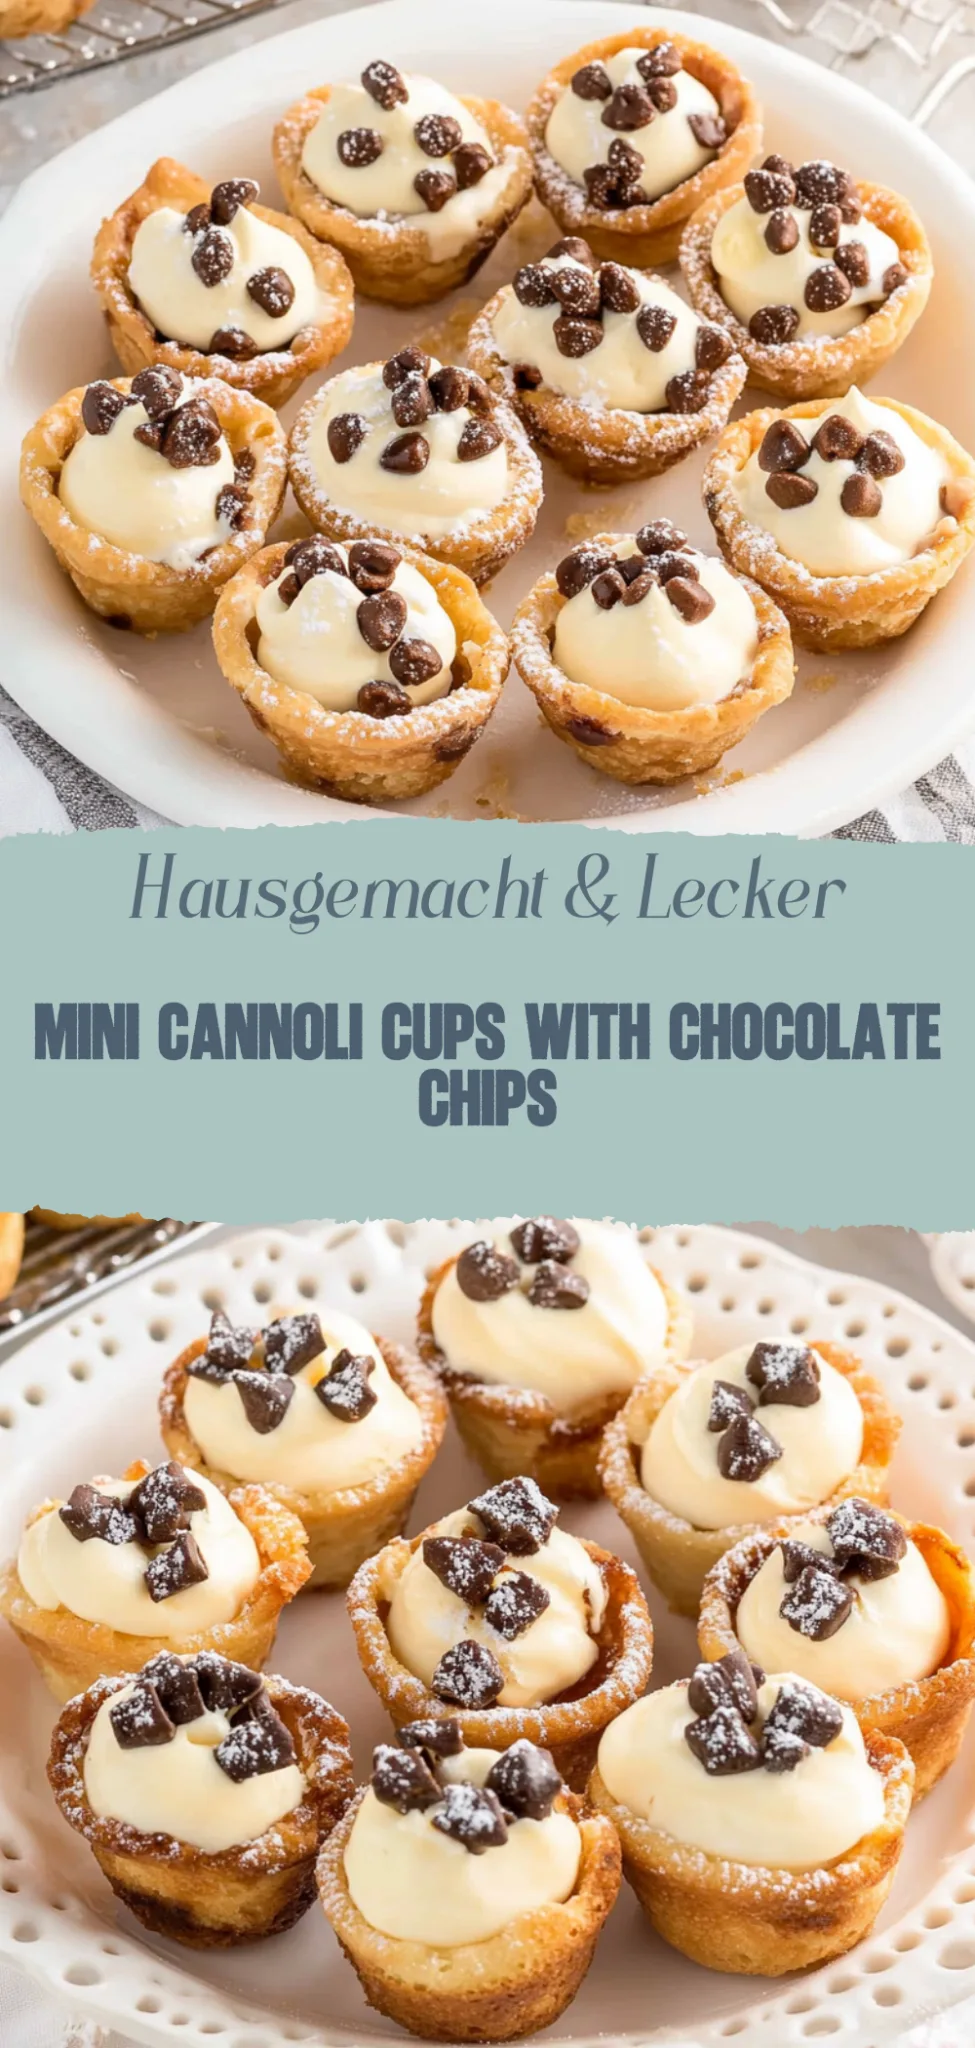
Mini Cannoli Cups: Indulgent and Irresistible Treats
Imagine sinking your teeth into a warm, buttery croissant, its flaky layers revealing a delightful gooey chocolate center that melts in your mouth. The aroma wafts through the air, inviting you to savor each moment, and suddenly, breakfast transforms into a luxurious experience that dances on your taste buds.
I still remember my first encounter with this heavenly treat at a charming little café in Paris, where every bite felt like a celebration of life itself. Perfect for lazy Sunday mornings or as an indulgent afternoon pick-me-up, these croissants promise not just satisfaction but also the joy of sharing delicious memories with loved ones over steaming cups of coffee.
Why are Mini Cannoli Cups a must-try?
Deliciously unique: These Mini Cannoli Cups put a fun twist on traditional cannoli, making them perfect for any occasion.
Quick to prepare: With minimal prep time, you can whip these up in no time!
Crowd pleaser: Their bite-sized format is ideal for sharing at parties or gatherings.
Versatile flavors: Customize the filling with your favorite ingredients for a personal touch.
Easy to make: No baking required, so anyone can create this delightful dessert!
Mini Cannoli Cups Ingredients
For the Shells:
- 1 cup all-purpose flour – This is the base for our crispy shells; whole wheat flour can be a healthier alternative.
- 2 tablespoons granulated sugar – Adds a touch of sweetness to balance the flavors; you can use coconut sugar for a lower glycemic option.
- 1/2 teaspoon cinnamon – Enhances the flavor profile; substitute with nutmeg for a different spice experience.
- 1/4 teaspoon salt – Helps to amplify the sweetness and flavor of the shells.
- 2 tablespoons unsalted butter (chilled and diced) – Provides tenderness; margarine can be used if you prefer dairy-free.
- 1 large egg yolk – Binds the mixture together; avoid using egg whites as they will make the dough too wet.
- 1 tablespoon white wine or vinegar – Adds flavor and helps with dough elasticity; you can use apple cider vinegar as a substitute.
For the Filling:
- 15 oz ricotta cheese (drained) – The creamy base of our filling; mascarpone can be used for extra richness.
- 1 cup powdered sugar – Sweetens the filling perfectly; you can adjust to taste depending on your preference.
- 1 teaspoon vanilla extract – Adds depth of flavor; almond extract works well for a nutty twist.
- 1/2 cup mini chocolate chips – These add delightful bites of chocolate; swap with chopped nuts for a different texture.
For Topping:
- 1/4 cup powdered sugar (for dusting) – Lightly sprinkle on top before serving for an elegant finish.
- Extra mini chocolate chips (optional) – For additional decoration and chocolatey goodness, use dark or milk chocolate based on preference.
Enjoy crafting these delightful Mini Cannoli Cups that will surely steal hearts at any gathering!
How to Make Mini Cannoli Cups
1. Preheat your oven to 375°F (190°C). This step ensures a perfectly crisp shell for your mini cannoli cups, giving them that delightful crunch we all love.
2. Prepare the dough by rolling out store-bought or homemade pastry sheets to about 1/8-inch thickness. Use a round cutter to create circles, perfect for shaping into cups.
3. Shape the pastry circles by draping them over a mini muffin tin. Gently press down to form cups, ensuring they hold a nice shape while baking.
4. Bake the cups in the preheated oven for 12-15 minutes until they are golden brown and crisp. Keep an eye on them; you want that lovely color without burning!
5. Cool the baked shells completely on a wire rack before filling them with the creamy mixture. This helps maintain their crispiness and prevents sogginess.
6. Mix the filling in a bowl by combining ricotta cheese, powdered sugar, and vanilla extract until smooth and creamy. The texture should be thick but spreadable for easy filling.
7. Fill each cooled cannoli cup with your delicious ricotta mixture using a piping bag or spoon. Don’t be shy—fill them generously for that mouthwatering experience!
8. Garnish with mini chocolate chips or chopped pistachios on top of each filled cup for an extra touch of sweetness and crunch.
Optional: Dust with powdered sugar just before serving for an elegant finish.
Exact quantities are listed in the recipe card below.
Tips for the Best Mini Cannoli Cups
- Perfect Shells: Use a mini muffin tin to shape your shells evenly, ensuring they bake to a crisp golden brown without burning.
- Cool Completely: Allow your cannoli cups to cool fully before filling. This prevents the filling from melting and creates a delightful contrast in textures.
- Avoid Sogginess: Fill your mini cannoli cups just before serving. This keeps the shells crispy and prevents them from becoming soggy over time.
- Flavor Variations: Experiment with different fillings! Adding chocolate chips or orange zest to the ricotta can elevate your mini cannoli cups.
- Presentation Matters: Dust with powdered sugar just before serving for an extra touch of elegance that makes your dessert pop visually.
How to Store and Freeze Mini Cannoli Cups
- Room Temperature: Enjoy your mini cannoli cups fresh for up to 2 hours at room temperature. After that, cover them to prevent drying out.
- Fridge: Store leftover mini cannoli cups in an airtight container for up to 3 days. This keeps the filling creamy while preserving the crispy shells.
- Freezer: For longer storage, freeze the empty mini cannoli shells for up to 1 month. Fill them with fresh ricotta mixture just before serving to maintain texture.
- Reheating: If you prefer warm mini cannoli cups, briefly heat the filled cups in a preheated oven at 350°F (175°C) for about 5 minutes. Enjoy them fresh!
Mini Cannoli Cups for Every Taste
Feel free to unleash your creativity and personalize these delightful treats with simple substitutions or exciting flavor twists!
- Dairy-Free: Swap ricotta with a vegan cream cheese alternative for a plant-based delight. This makes it perfect for dairy-sensitive friends.
- Chocolate Lovers: Fold in mini chocolate chips into the filling for an extra burst of sweetness. You’ll add a rich, decadent layer that will make every bite irresistible.
- Citrus Zing: Add a teaspoon of lemon or orange zest to the filling for a refreshing twist. The citrus brightens the flavors and adds an enjoyable pop!
- Nutty Crunch: Sprinkle crushed pistachios or almonds on top for added texture. This gives your mini cannoli cups a delightful crunch that complements the creamy filling beautifully.
- Spice It Up: Incorporate a pinch of cinnamon or nutmeg into the filling for warmth. These spices transform the dessert into something cozy and inviting, perfect for any gathering.
- Fruit Fusion: Top with fresh berries or sliced peaches for a fruity explosion. This adds both color and flavor, making each cup feel like a celebration.
- Caramel Drizzle: Drizzle homemade or store-bought caramel sauce over the tops before serving. It introduces a luscious sweetness that pairs wonderfully with the creamy filling.
- Mini Heat: Add a touch of cayenne pepper to the filling for an unexpected kick. This daring move creates an exciting contrast that adventurous eaters will adore!
Make Ahead Options
If you’re planning a gathering or simply want to indulge at home, these Mini Cannoli Cups are perfect for meal prep! You can make the cannoli filling up to 3 days in advance—just store it in an airtight container in the refrigerator. For the cups, prepare and bake the pastry shells a day before serving; keep them in an airtight container at room temperature to maintain their crispness. When it’s time to serve, simply fill each shell with the chilled filling and top with chocolate chips or pistachios. This way, you can save time while ensuring each bite remains as delightful as when freshly made!
Mini Cannoli Cups Recipe FAQs
What type of ricotta cheese should I use for Mini Cannoli Cups?
For the richest flavor and texture, opt for whole milk ricotta cheese. Be sure to drain it well to avoid a watery filling. If you want a creamier consistency, blend it briefly in a food processor until smooth. This will help achieve that dreamy filling texture that melts in your mouth!
How should I store my Mini Cannoli Cups?
Store the filled Mini Cannoli Cups in an airtight container in the refrigerator for up to 2 days. If you want to keep the shells crispy, store them separately and fill them just before serving. This way, they maintain their delightful crunch and don’t become soggy!
Can I freeze Mini Cannoli Cups?
Yes! You can freeze the shells for up to 2 months. Just make sure they are completely cool before placing them in a freezer-safe bag or container. When ready to serve, thaw the shells at room temperature and fill them with the ricotta mixture just before enjoying.
What if my cannoli filling is too runny?
If your filling turns out too runny, don’t fret! A quick fix is to add a little powdered sugar or some finely crushed cannoli shells to thicken it up. You could also place the filling in a sieve lined with cheesecloth for about 30 minutes to drain any excess moisture. This will help you achieve that perfect, velvety texture without compromising on taste.
Are there any dietary alternatives for Mini Cannoli Cups?
Absolutely! For a gluten-free version, you can substitute traditional cannoli shells with gluten-free pastry dough or even use almond flour-based shells. For those looking for a dairy-free option, try using coconut cream instead of ricotta; just whip it until fluffy and sweeten it with maple syrup or agave nectar.
Can I make Mini Cannoli Cups ahead of time?
Yes, you can prepare the components ahead of time! Make the filling a day in advance and refrigerate it. Just remember to fill the cups right before serving to keep those delightful shells crisp and fresh. Enjoying these treats after a long day is such a joy—just like sharing stories with family around the table!