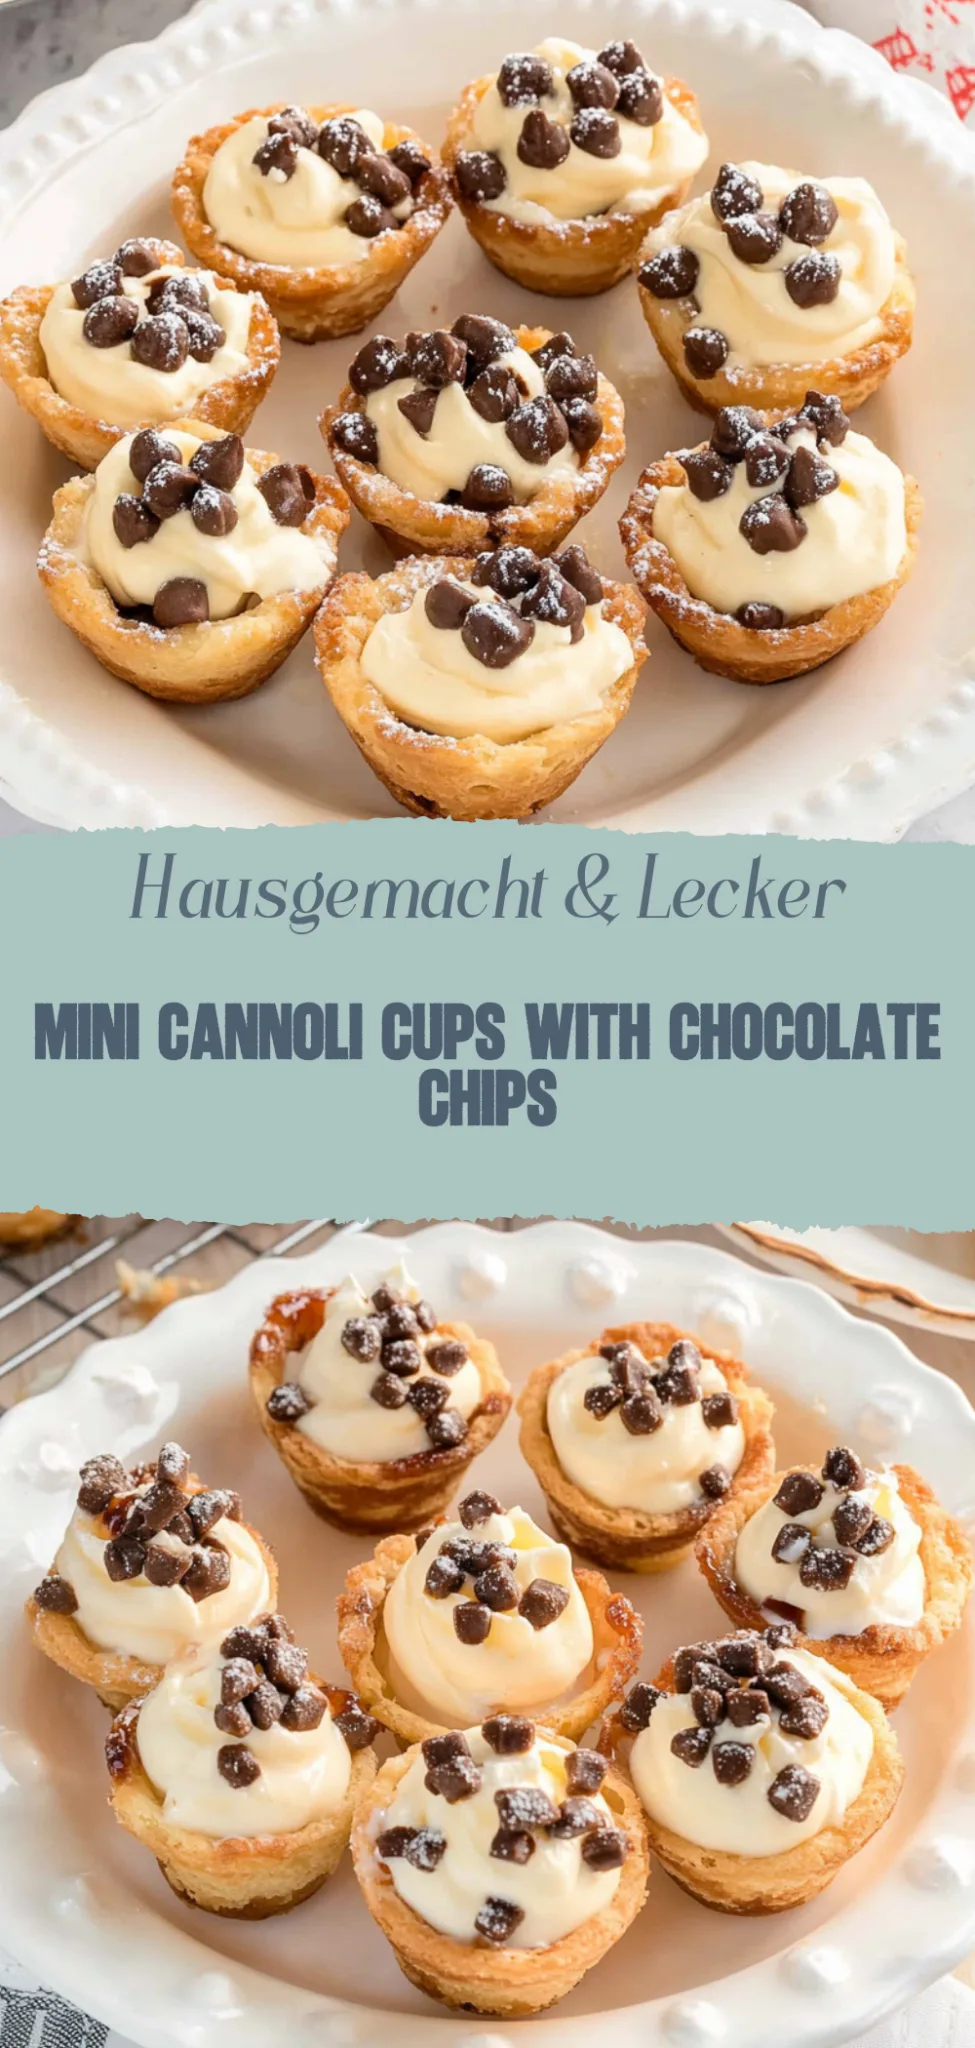
Mini Cannoli Cups: Decadent and Easy Dessert Treats
Imagine sinking your teeth into a warm, gooey slice of chocolate cake, the rich aroma enveloping you like a cozy blanket on a chilly day. Each bite bursts with deep, velvety chocolate that dances on your taste buds, while the frosting adds just the right amount of sweetness, making it impossible to resist reaching for another piece.
This delectable creation isn’t just a dessert; it’s a celebration waiting to happen, perfect for birthdays or cozy family gatherings. I can still recall my grandmother’s kitchen filled with laughter and the smell of her famous chocolate cake—moments like those remind us that food has the power to create unforgettable memories and bring us closer together.
Why are Mini Cannoli Cups irresistible?
Deliciously easy to make, these Mini Cannoli Cups bring the classic Italian dessert to your table without the fuss. Unique presentation makes them a showstopper at any gathering, while fluffy filling delights with every bite. Perfect for parties or a sweet treat at home, they save time and effort. Versatile options let you customize flavors; everyone will love them!
Mini Cannoli Cups Ingredients
For the Cups:
- 1 package (15 oz) mini phyllo pastry shells – These ready-made shells save time and provide a delightful crunch.
- 1/4 cup granulated sugar – Sweetens the filling; consider using powdered sugar for a smoother texture.
- 1 teaspoon vanilla extract – Adds warmth; you can substitute with almond extract for a different flavor.
- 1/2 teaspoon ground cinnamon – Enhances the overall taste; adjust to your preference for spice.
For the Filling:
- 1 cup ricotta cheese – The base of your filling; make sure it’s well-drained for the best texture.
- 1/2 cup mascarpone cheese – Provides creaminess; you can use cream cheese if you’re in a pinch.
- 1/2 cup powdered sugar – Balances flavors and gives a sweeter touch; adjust based on your sweetness preference.
- 1/4 cup mini chocolate chips – Adds delightful bursts of chocolate in every bite; feel free to use dark chocolate chips for a richer flavor.
For Garnishing:
- 2 tablespoons chopped pistachios – Provides a lovely crunch and color contrast; walnuts or almonds can be used as alternatives.
- 1 tablespoon cocoa powder – A light dusting adds visual appeal and an extra hint of chocolate flavor.
- Fresh mint leaves (for decoration) – Optional, but they add a fresh pop of color to your presentation.
These Mini Cannoli Cups are perfect for any occasion, blending traditional flavors with an easy-to-eat format!
How to Make Mini Cannoli Cups
1. Preheat your oven to 375°F, allowing it to reach the perfect temperature while you prepare your dough. A cozy, warm kitchen sets the stage for these delightful treats.
2. Roll out the dough on a lightly floured surface until it’s about 1/8 inch thick. This will create the perfect base for your mini cannoli cups, ensuring they are crisp and golden after baking.
3. Cut circles from the rolled dough using a cookie cutter or a glass, aiming for about 3 inches in diameter. Gather any scraps and re-roll them for more circles; no waste here!
4. Mold the circles around a greased mini muffin tin, gently pressing them down to form cup shapes. They should fit snugly as they will puff up while baking.
5. Bake in the preheated oven for 8-10 minutes, or until they turn golden brown and smell heavenly. Keep an eye on them; you want that perfect color!
6. Cool the baked cups in the pan for 5 minutes before transferring them to a wire rack to cool completely. This step is crucial for achieving that delightful crunch!
7. Prepare the filling by combining ricotta cheese, powdered sugar, vanilla extract, and chocolate chips in a bowl until smooth and creamy.
8. Fill each cooled cannoli cup with the ricotta mixture using a piping bag or spoon. Don’t be shy—fill them generously for that irresistible bite!
9. Garnish with a dusting of powdered sugar and maybe some extra chocolate chips on top for added flair! Presentation matters when serving these sweet delights.
Optional: Drizzle with melted chocolate for an extra touch of indulgence.
Exact quantities are listed in the recipe card below.
Tips for the Best Mini Cannoli Cups
- Choose Quality Ingredients: Use fresh ricotta and mascarpone for a rich, creamy filling. Avoid low-fat versions, as they can compromise flavor.
- Perfect Shells: Ensure your cannoli cups are crisp by baking them just until golden. Overbaking can lead to a tough texture.
- Fill Just Before Serving: To prevent soggy shells, fill the mini cannoli cups with cream right before serving. This keeps them delightfully crunchy.
- Mind the Sweetness: Taste your filling before piping it into the shells. Adjust sugar levels based on your preference but remember, balance is key!
- Garnish Wisely: Dust with powdered sugar or drizzle chocolate for an elegant finish. This not only enhances presentation but adds a touch of sweetness to your mini cannoli cups.
Storage Tips for Mini Cannoli Cups
- Room Temperature: Enjoy your mini cannoli cups fresh for up to 2 hours at room temperature. After that, refrigerate to maintain their creamy filling and crisp shell.
- Fridge: Store mini cannoli cups in an airtight container in the fridge for up to 3 days. This keeps the shells crunchy while preserving the delicious ricotta filling.
- Freezer: If you want to save some for later, freeze the empty cannoli shells for up to 2 months. Fill them with creamy goodness just before serving for best texture.
- Reheating: To revive leftover mini cannoli cups, let them sit at room temperature for about 30 minutes before serving. This helps enhance their delightful flavors!
Mini Cannoli Cups Customization Ideas
Elevate your dessert experience by exploring these delightful twists on a classic favorite!
- Dairy-Free: Swap out ricotta for a vegan cream cheese alternative. Blend with powdered sugar and vanilla for a creamy filling.
- Chocolate-Dipped: Dip the edges of the mini cups in melted chocolate before filling. This adds a rich, indulgent flavor that everyone will love.
- Citrus Zest: Incorporate lemon or orange zest into the filling. This brightens up the flavors and adds a refreshing twist.
- Nutty Crunch: Fold in finely chopped pistachios or hazelnuts for added texture. The crunch complements the creamy filling beautifully.
- Spiced Delight: Add a pinch of cinnamon or nutmeg to the ricotta mixture. This warm spice creates an inviting aroma that enchants every bite.
- Fruit-Filled: Layer fresh berries or sliced peaches between the filling and the shell. The fruity burst brings a lovely contrast to each mouthful.
- Mini Chocolate Chips: Stir in mini chocolate chips for an extra touch of sweetness. They melt slightly, creating delightful pockets of chocolate goodness.
- Spicy Kick: Mix in a dash of chili powder or cayenne pepper for a surprising heat element. It’s an adventurous twist that will intrigue your taste buds!
Make Ahead Options
Mini Cannoli Cups are a delightful treat that can easily fit into your meal prep routine, making them perfect for gatherings or satisfying your sweet cravings throughout the week. You can prepare the cannoli filling up to 3 days in advance; simply store it in an airtight container in the refrigerator. The mini shells, on the other hand, can be made and stored at room temperature for up to 24 hours before assembly. When you’re ready to serve, fill the cups with the chilled filling and garnish them with chocolate chips or pistachios right before enjoying for maximum freshness. This way, you’ll save time while still delivering a delicious dessert that feels special!
Mini Cannoli Cups Recipe FAQs
How do I choose the best ricotta cheese for my Mini Cannoli Cups?
For the creamiest filling, opt for whole milk ricotta that is well-drained. Look for brands that specify “fresh” on the label, as this will provide a richer flavor. If your ricotta seems watery, simply place it in a cheesecloth and let it drain for about 30 minutes before using. This helps achieve that perfectly smooth texture!
What’s the best way to store leftover Mini Cannoli Cups?
Store any leftover Mini Cannoli Cups in an airtight container in the refrigerator. They’ll stay fresh for up to 2 days. However, if you want to keep the shells crispy, consider storing the shells and filling separately and assembling them just before serving.
Can I freeze Mini Cannoli Cups?
Yes, you can freeze the shells! Place them in an airtight container or freezer bag and they’ll last for about 2 months in the freezer. Just be sure to thaw them at room temperature before filling with your delicious ricotta mixture to keep them crisp.
What should I do if my cannoli filling is too runny?
If your filling turns out runny, don’t worry! You can thicken it by adding a bit of powdered sugar or cornstarch. Start with one tablespoon of powdered sugar or cornstarch at a time until you reach your desired consistency. Mixing in some crushed cannoli shells or graham cracker crumbs can also add flavor while thickening up your filling.
Are there any dietary alternatives for making Mini Cannoli Cups?
Absolutely! For a dairy-free option, substitute traditional ricotta with almond or cashew-based cream cheese. You can also use gluten-free mini tart shells if you’re avoiding gluten. This way, everyone can enjoy these delightful treats without compromising on taste!
How long do Mini Cannoli Cups take to prepare and serve?
From start to finish, you’re looking at about 45 minutes to an hour for preparation and assembly. The shell baking takes around 10-15 minutes, while preparing the filling takes another 15 minutes. Once assembled, serve immediately for the best texture—crispy shells filled with creamy goodness are what make these treats truly irresistible!