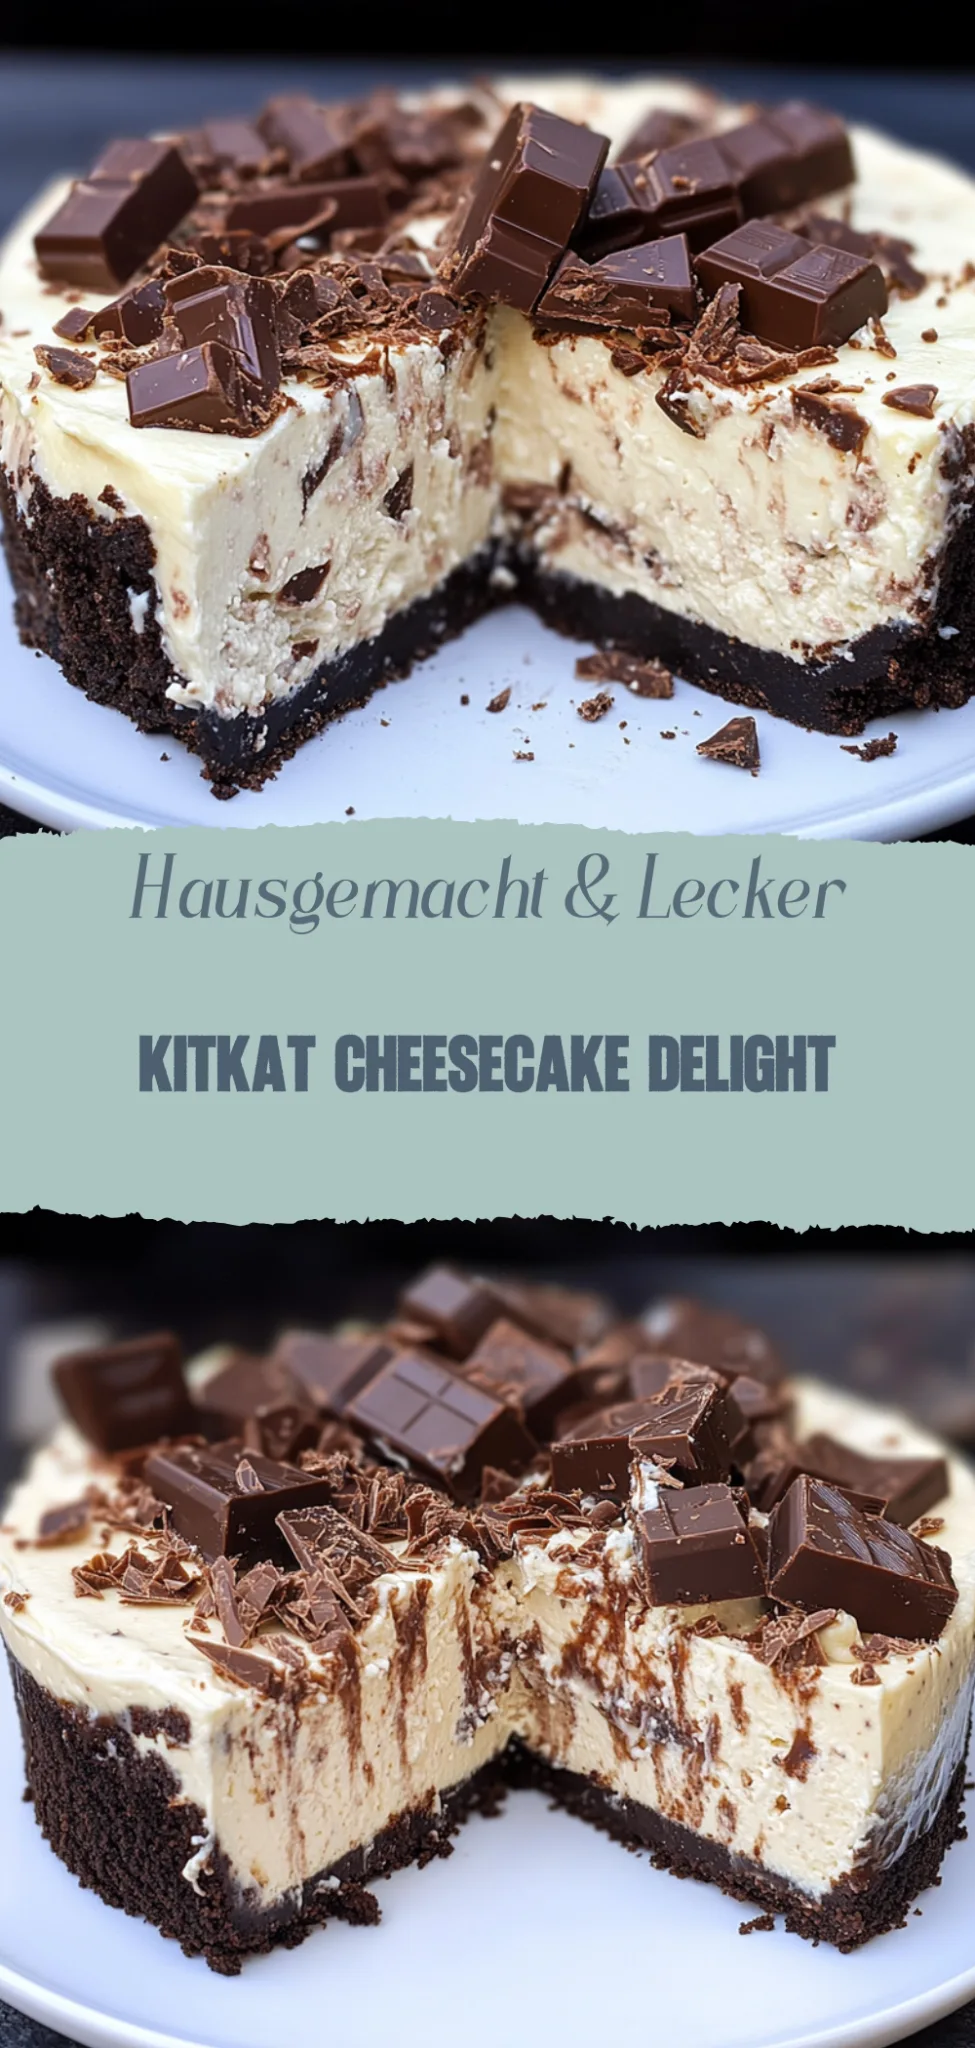
KitKat Cheesecake: Indulgent Chocolate Bliss Awaits
Imagine sinking your teeth into a warm, gooey slice of chocolate cake, where rich cocoa dances with velvety buttercream, sending waves of sweetness and nostalgia through your senses. The aroma alone is enough to transport you back to that childhood birthday party, where laughter echoed and every bite felt like pure bliss, making it the perfect treat for celebrations or just a cozy night in.
As you savor each forkful, memories of family gatherings flood your mind—everyone gathered around the table, eyes sparkling with anticipation. This chocolate cake isn’t just dessert; it’s a delicious experience waiting to happen, promising to wrap you in warmth and joy with every mouthful. Get ready for an unforgettable flavor journey that will have you grinning from ear to ear!
Why is KitKat Cheesecake a must-try?
Indulge in a dessert that’s both delightful and unique!
Easy to make, this recipe requires minimal effort and delivers maximum flavor.
Decadent layers of creamy cheesecake paired with the beloved crunch of KitKat bars create an unforgettable taste experience.
Perfect for gatherings, it’s sure to impress friends and family alike, making you the star of any occasion.
Versatile options allow you to customize with your favorite chocolate or toppings, ensuring every bite is just right!
KitKat Cheesecake Ingredients
For the Crust:
- 1 ½ cups chocolate sandwich cookies (crushed) – Crush finely to create a solid base; Oreos work wonderfully for this
- 5 tablespoons unsalted butter (melted) – This helps bind the cookie crumbs together; use coconut oil for a dairy-free option
For the Cheesecake Filling:
- 16 oz cream cheese (softened) – Use full-fat for a rich and creamy texture; Neufchâtel is a lower-fat substitute
- 1 cup granulated sugar – Sweetens the filling perfectly; consider using coconut sugar for a caramel-like flavor
- 3 large eggs – Essential for structure and creaminess; room temperature eggs blend better into the mixture
- 1 teaspoon vanilla extract – Enhances flavor; you can substitute with almond extract for a different twist
- 1 cup sour cream – Adds tanginess and smoothness; Greek yogurt can be used as a healthy alternative
- 6 KitKat bars (chopped) – The star of your KitKat cheesecake, providing that signature chocolate-crunch flavor
For the Topping:
- 1 cup heavy whipping cream – For a fluffy topping; you can use coconut cream for a non-dairy version
- 2 tablespoons powdered sugar – Sweetens the whipped cream; adjust according to your taste preferences
- 2 KitKat bars (broken into pieces) – For garnish, adding an extra crunch on top of your cheesecake
Remember, this delightful KitKat Cheesecake will surely become a family favorite!
How to Make KitKat Cheesecake
1. Prepare the crust:
Crush 1 ½ cups of graham crackers until fine. Mix with ½ cup melted butter and press firmly into a 9-inch springform pan. Bake at 350°F for 10 minutes until slightly golden.
2. Mix the filling:
Beat 16 oz cream cheese until smooth, then add ¾ cup sugar and 1 tsp vanilla extract. Blend well, ensuring no lumps remain; it should be creamy and light.
3. Add eggs:
Incorporate 3 large eggs, one at a time, mixing gently after each addition. This will keep your cheesecake fluffy and airy—aim for a silky texture.
4. Fold in chocolate:
Gently fold in 1 cup of melted chocolate (dark or milk) until fully combined. The mixture should have a rich, glossy appearance that invites you to dig in!
5. Layer with KitKats:
Chop up 4-5 KitKat bars and mix them into the batter for delightful crunch and flavor. You can also reserve some for topping later!
6. Bake the cheesecake:
Pour your batter over the prepared crust and bake at 325°F for about 60 minutes, or until the edges are set but the center still has a slight jiggle.
7. Cool completely:
Remove the cheesecake from the oven and let it cool at room temperature for an hour before refrigerating for at least four hours or overnight for best results.
8. For the Topping:
Whip up some heavy cream with a bit of sugar until soft peaks form. Spread this over your chilled cheesecake and sprinkle remaining chopped KitKat pieces on top.
Optional: Drizzle with chocolate sauce for an extra indulgent touch!
Exact quantities are listed in the recipe card below.
Tips for the Best KitKat Cheesecake
- Chill Time Matters: Allow your cheesecake to chill for at least 4 hours. This helps it set properly and enhances the flavors.
- Crust Consistency: Use finely crushed cookies for the crust. Avoid large chunks, as they can lead to a crumbly texture that doesn’t hold together.
- Room Temperature Ingredients: Ensure your cream cheese is at room temperature before mixing. This prevents lumps and creates a smooth, creamy filling for your KitKat cheesecake.
- Gentle Mixing: Mix your batter on low speed. Overmixing can introduce air, resulting in cracks as the cheesecake bakes and cools.
- Cool Gradually: After baking, turn off the oven and crack the door open to let the cheesecake cool gradually. This helps prevent cracking on the surface.
Storage Tips for KitKat Cheesecake
- Room Temperature: KitKat cheesecake can be kept out for up to 2 hours while serving, but it’s best to refrigerate leftovers promptly to maintain freshness.
- Fridge: Store your KitKat cheesecake in an airtight container in the fridge for up to 5 days. This will keep it moist and delicious for every slice!
- Freezer: For longer storage, wrap individual slices of KitKat cheesecake tightly in plastic wrap and then aluminum foil. It will last up to 3 months in the freezer.
- Thawing: When ready to enjoy, simply transfer your frozen KitKat cheesecake to the fridge for a few hours or overnight to thaw gently before serving.
KitKat Cheesecake Customization Ideas
Unleash your creativity with this delightful dessert by trying out these fun and tasty variations!
- Gluten-Free: Swap regular cookies for gluten-free Oreo or graham cracker alternatives to keep the crust delicious and safe for all. Your loved ones won’t even notice the difference!
- Vegan: Use dairy-free cream cheese and coconut whipped cream for a luscious plant-based version that’s just as indulgent. This variation embraces everyone at the table, ensuring nobody feels left out.
- Nutty Twist: Add crushed almonds or walnuts into the crust for an extra crunch and nutty flavor. This subtle change adds a delightful texture that will surprise your taste buds!
- Chocolate Overload: Incorporate chocolate pudding mix into the cheesecake filling for an extra chocolatey experience. Each bite becomes a rich, velvety dream that chocolate lovers will adore.
- Minty Fresh: Mix in a few drops of peppermint extract to the filling for a refreshing twist. The cool mint balances perfectly with the sweetness, creating a uniquely inviting flavor.
- Fruit Fusion: Top your cheesecake with fresh berries or a homemade berry compote for a burst of fruity goodness. The tartness from the fruit beautifully contrasts with the creamy cheesecake base.
- Spicy Kick: Add a pinch of cayenne pepper to the filling for an unexpected heat that enhances all the other flavors. This playful twist will intrigue adventurous eaters while keeping it fun and vibrant!
- Caramel Drizzle: Swirl in some caramel sauce before chilling for a luscious, gooey sweetness throughout. It’s like adding a hug to each slice, making every bite irresistible!
Make Ahead Options
Preparing a KitKat Cheesecake in advance is a fantastic way to save time while ensuring you have a delicious dessert ready for any occasion. You can make the cheesecake base up to 3 days ahead; simply wrap it tightly in plastic wrap and refrigerate. Additionally, you can chop the KitKat bars and prepare the chocolate ganache up to 24 hours in advance. When you’re ready to serve, just layer the ganache on top of the chilled cheesecake and sprinkle the chopped KitKats for that delightful crunch. To maintain quality, store everything separately until serving time, and avoid topping it too early to keep those KitKat pieces fresh and crisp. This approach not only streamlines your prep but also guarantees a show-stopping KitKat Cheesecake ready to impress your family and friends!
KitKat Cheesecake Recipe FAQs
What type of cream cheese should I use for the KitKat Cheesecake?
For the creamiest texture, opt for full-fat cream cheese. It blends beautifully and gives your cheesecake that rich, indulgent flavor. Make sure it’s at room temperature before mixing; this helps prevent lumps and ensures a smooth batter.
How should I store my leftover KitKat Cheesecake?
Store any leftovers in an airtight container in the refrigerator. It will stay fresh for about 3-5 days. If you want to keep it longer, wrap individual slices tightly with plastic wrap and place them in a container to prevent freezer burn.
Can I freeze my KitKat Cheesecake?
Absolutely! To freeze, first let the cheesecake cool completely. Wrap it tightly with plastic wrap followed by aluminum foil to protect it from freezer odors. It can be frozen for up to 2-3 months. Just remember to thaw it in the fridge overnight before serving!
What if my cheesecake cracks while baking?
Cracking can happen, but don’t fret! This is often due to rapid temperature changes. Bake your cheesecake in a water bath to create a gentle steam environment, which helps keep it moist and minimizes cracks. If you do end up with a crack, cover it up with whipped cream or crushed KitKats – no one will ever know!
Is there a gluten-free option for this recipe?
Yes! You can easily make a gluten-free KitKat Cheesecake by using gluten-free cookies for the crust. Look for brands that are certified gluten-free to ensure safety. Additionally, check that your chocolate bars are gluten-free as well.
Can I use a different type of chocolate instead of KitKats?
Certainly! While KitKats add a delightful crunch, feel free to experiment with other chocolates that you love – think Milky Way or Twix for an interesting twist! Just adjust the quantity based on sweetness as some chocolates may be sweeter than others.